Rendering with Redshift
Ornatrix supports native rendering with Redshift 3D renderer. This means that the hair doesn't need to be converted to a mesh or curves as an intermediate step and instead is fed directly to Redshift 3D for rendering. This saves time and memory and produces better looking results, especially when used together with Redshift's own hair shader.
To render hair with Redshift, simply change renderer to Redshift 3D and press render:

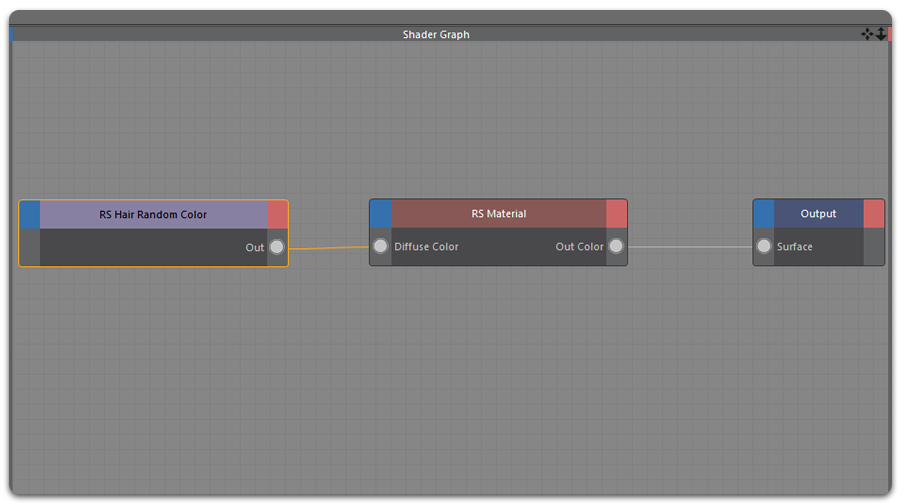
By default, Ornatrix will use the UVs of the distribution mesh for the hair strands, but you can assing per-strand colors and gradients using the RS Hair Random Color and RS Hair Position.
Shading Ornatrix Hair with Redshift
Per-Strand Color
Ornatrix automatically export the UVs and Curve IDs to Redshift, this allows you to create complex hair shaders adding color and texture variations. The Hair Random Color utility texture allows you to randomize a color or texture map across all hair strands using the curve ID data provided by Ornatrix.
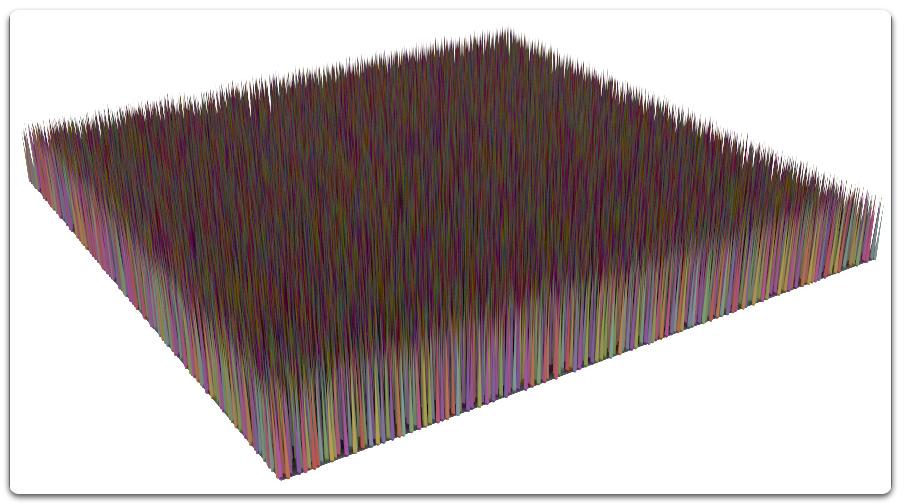
In this example you can see how this node can be used to add color variations to the hair. Connect the "Hair Random Color" utility texture to the Diffuse Color input of the hair shader:
Then play with the Hue, Saturation and Value amount until you get the desired effect:
Hair Position
Hair Position utility can be used to get the positions along the hair strands, allowing you to texture the hair from root to tip, adding gradients and other effects.
In this example, we use a Redshift Ramp Texture to add a gradient color along the strands. The Hair Position node should be connected to the Uv Coord input of the Ramp Texture node:
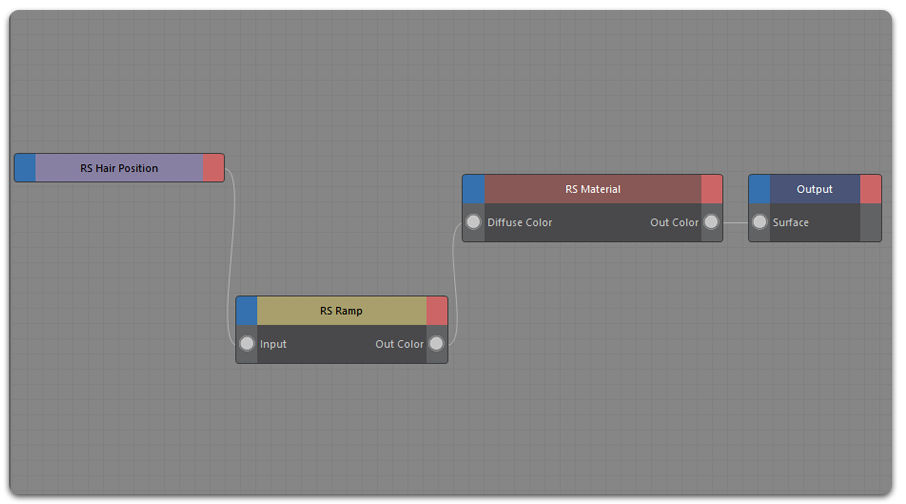
Then connect the Ramp Texture to the Diffuse Color channel of the hair shader or any other input that you would like to control using the ramp texture:

Hair Antialiasing
The Hair Min pixel width option can be used to alleviate aliasing issues by thickening and adding some transparency to the hair strands at render time. Besides, this technique helps to reduce the noise and artifacts making the hair looks cleaner.
To activate this option go to Render Settings, with Redshift selected as current rendering engine go to the Optimization tab, expand the “Min pixel width†section and check the "Enable" checkbox. For more information about all the parameters found in the Hair Min pixel width section please go to Redshift Documentation
Hair Shading sample scene
A sample scene with RS Hair Position and RS Hair Random Color can be downloaded from "HERE.":PlaceHolder.com The scene contains a basic stack with two hair objects showing the output given by both nodes.
Shading Feathers
You can easily texture feathers generated by the Mesh From Strands operator. The resulting meshes can be generated with as many UV sets as you need for texture layering. In the following example we are going to explore how Mesh From Strands and different UV sets can be used for feather texturing.
Generating feather meshes
Add Mesh From Strands at the top level of your hair stack. Now your hairs have been converted to mesh but every operator under Mesh From Strands still affects the meshes. You can add a Change Width to determine the shape of the feathers using the ramp curve. But since we are going to use an alpha map to determine the shape of the feathers we don't have to draw a custom shape, just use the Width amount to increase the width of the planes as you desire:
Generating UVs
We need at least two channels of UVs for proper texturing: One UV channel where the feathers inherit the UVs from the distribution mesh, allowing us to texture the feathers with the same texture as the distribution mesh. One Per-Strand UV channel to texture the polygon planes from root to tip, allowing us to apply the alpha feather texture on a Per-Strand basis.
To generate the necessary UV channels go back to Mesh From Strands. In the UV Mapping tab, increase the Map Channel Count to 2, this creates two UV channels for us:
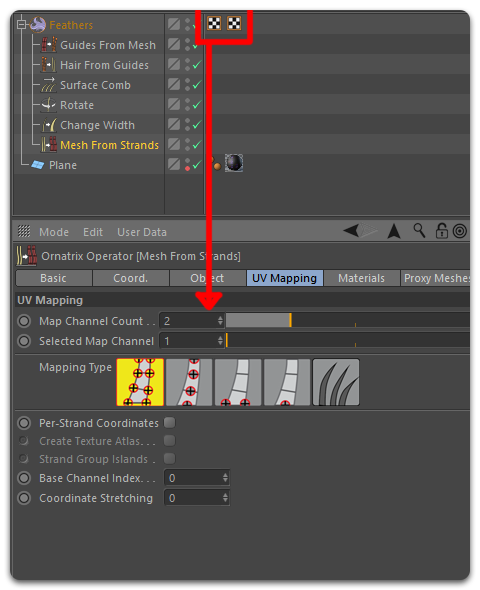
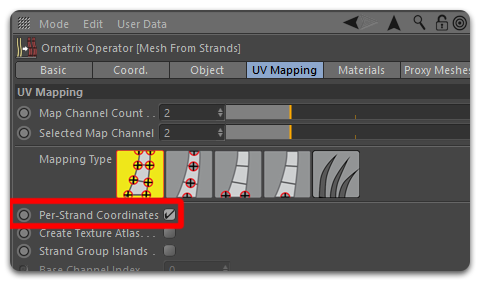
The hair object now have two UVW tags. Use the Selected Map Channel parameter to select between the two channels. The Mapping Type of the first channel is channel to One UV at each vertex by default, this allows the feathers to inherit the UVs from the distribution mesh. Use Selected Map Channel to select the second channel, leave the Mapping Type of this channel as it is but turn on the Per-Strand Coordinates checkbox.
Linking the textures to the UVs
Now that the UVs are ready we can link each channel to a different texture. To do so:
Add a Redshift material to the hair object and open it with the Redshift Shader Graph. We are going to link one texture to each channel: A feather alpha map and a texture color map. Add two texture nodes and load any alpha map for a feather. In this case I had to extract the alpha from the texture using a RS Color Splitter. Finally, go to the UV section of the texture node of the alpha map and write the name of the Per-Strand UV channel we created previously, in this case is the channel2:
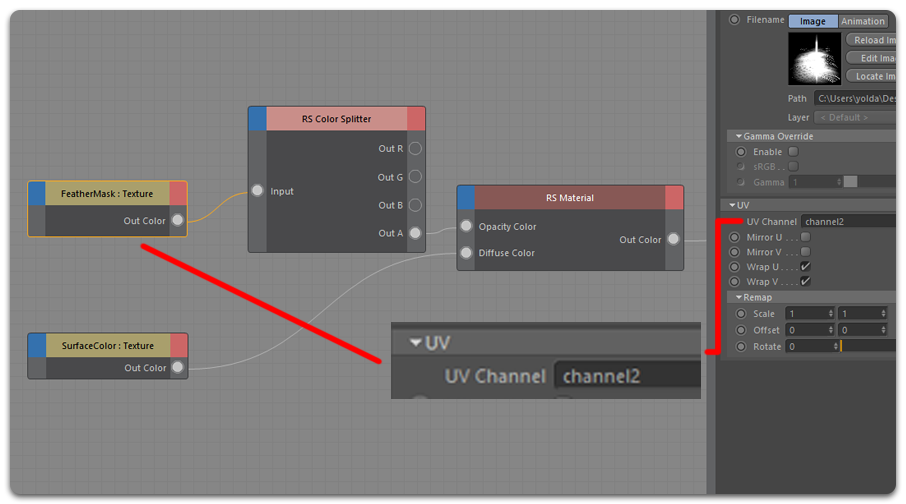
Connect the color texture the same way, but this name you should link it to channel one to get the colors from the distribution mesh. If we launch a render we should get something like this:

Troubleshooting
Ornatrix hair is not rendered when a RS Hair Shader is applied to it:
As of Redshift version 2.6.40 the default transparency attribute on the Redshift Hair Shader is one instead of zero, making the hair invisible on the render. Set this value to 0 to render the hair properly.
Minimum Requirements
- Redshift Version 2.6.36 or newer