


Wind and Underwater Hair Simulation with Moov
In this article, we will use Moov Physics to create a wind and underwater hair simulation.
Ornatrix includes a special Python script for Moov optimized for wind simulations. We will use it to create the following animation:
Wind simulation slow motion
Preparing the Groom
We will start by reducing the groom to its most basic form. The goal is to simulate only what is necessary instead of simulating hundreds of thousands of hair strands, which would take considerably longer and is often unnecessary.
Ideally, we simulate the guides instead of the final dense hair. The movement of the guides can then be transferred to the final strands through Hair from Guides.
It is possible to simulate all strands directly, but viewport performance can suffer significantly. This makes configuring and previewing the simulation much slower.
Another option is to configure the simulation using only the guides, then move the Moov operator above Hair from Guides once the simulation settings are ready. This allows you to work quickly with the guides first and later apply the same setup to all render strands.
For this article, we will simulate only the guides because this is enough for the result we want.
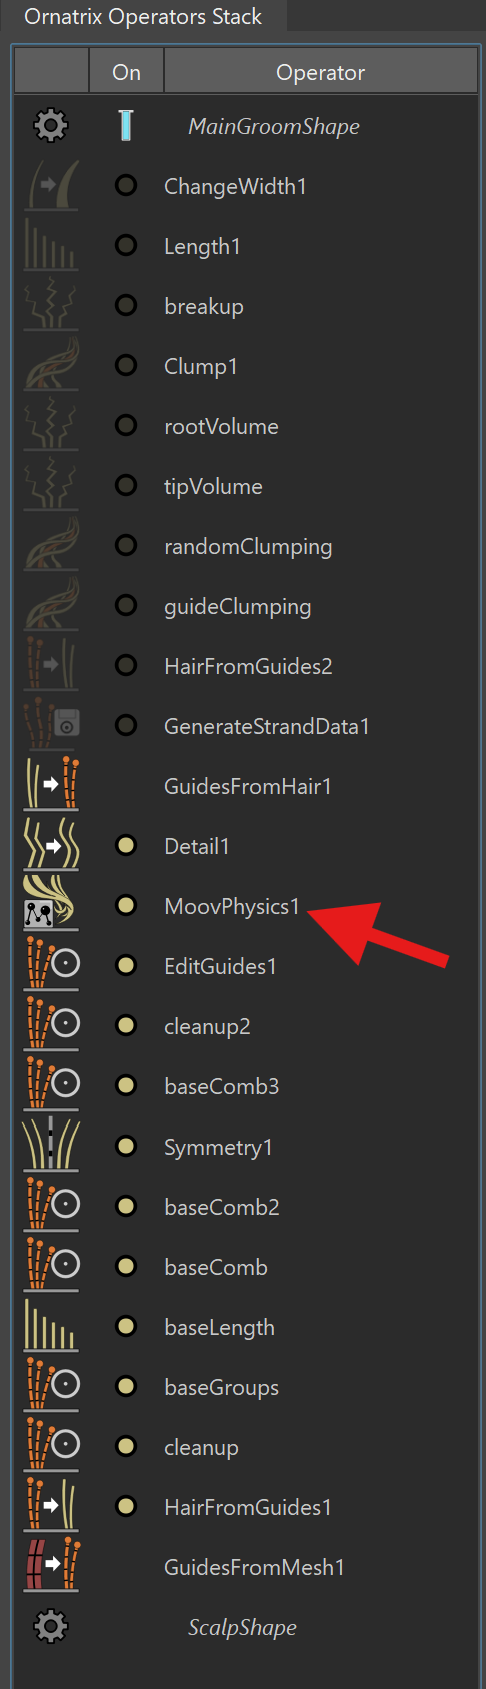
Disable Hair from Guides and the operators above it that depend on the generated dense hair. At this point, add a MoovPhysics operator.
The operator stack now looks like this:
Guide Resolution
This groom contains approximately 1200 guides with 10 vertices per guide.
1200 guides may be more than necessary for this particular groom, but it gives us enough resolution to produce detailed motion while requiring very little interpolation.
At the same time, using only 10 vertices per guide is an optimization. We want to simulate the smallest amount of geometry necessary to get good results, better performance, and faster iteration times.
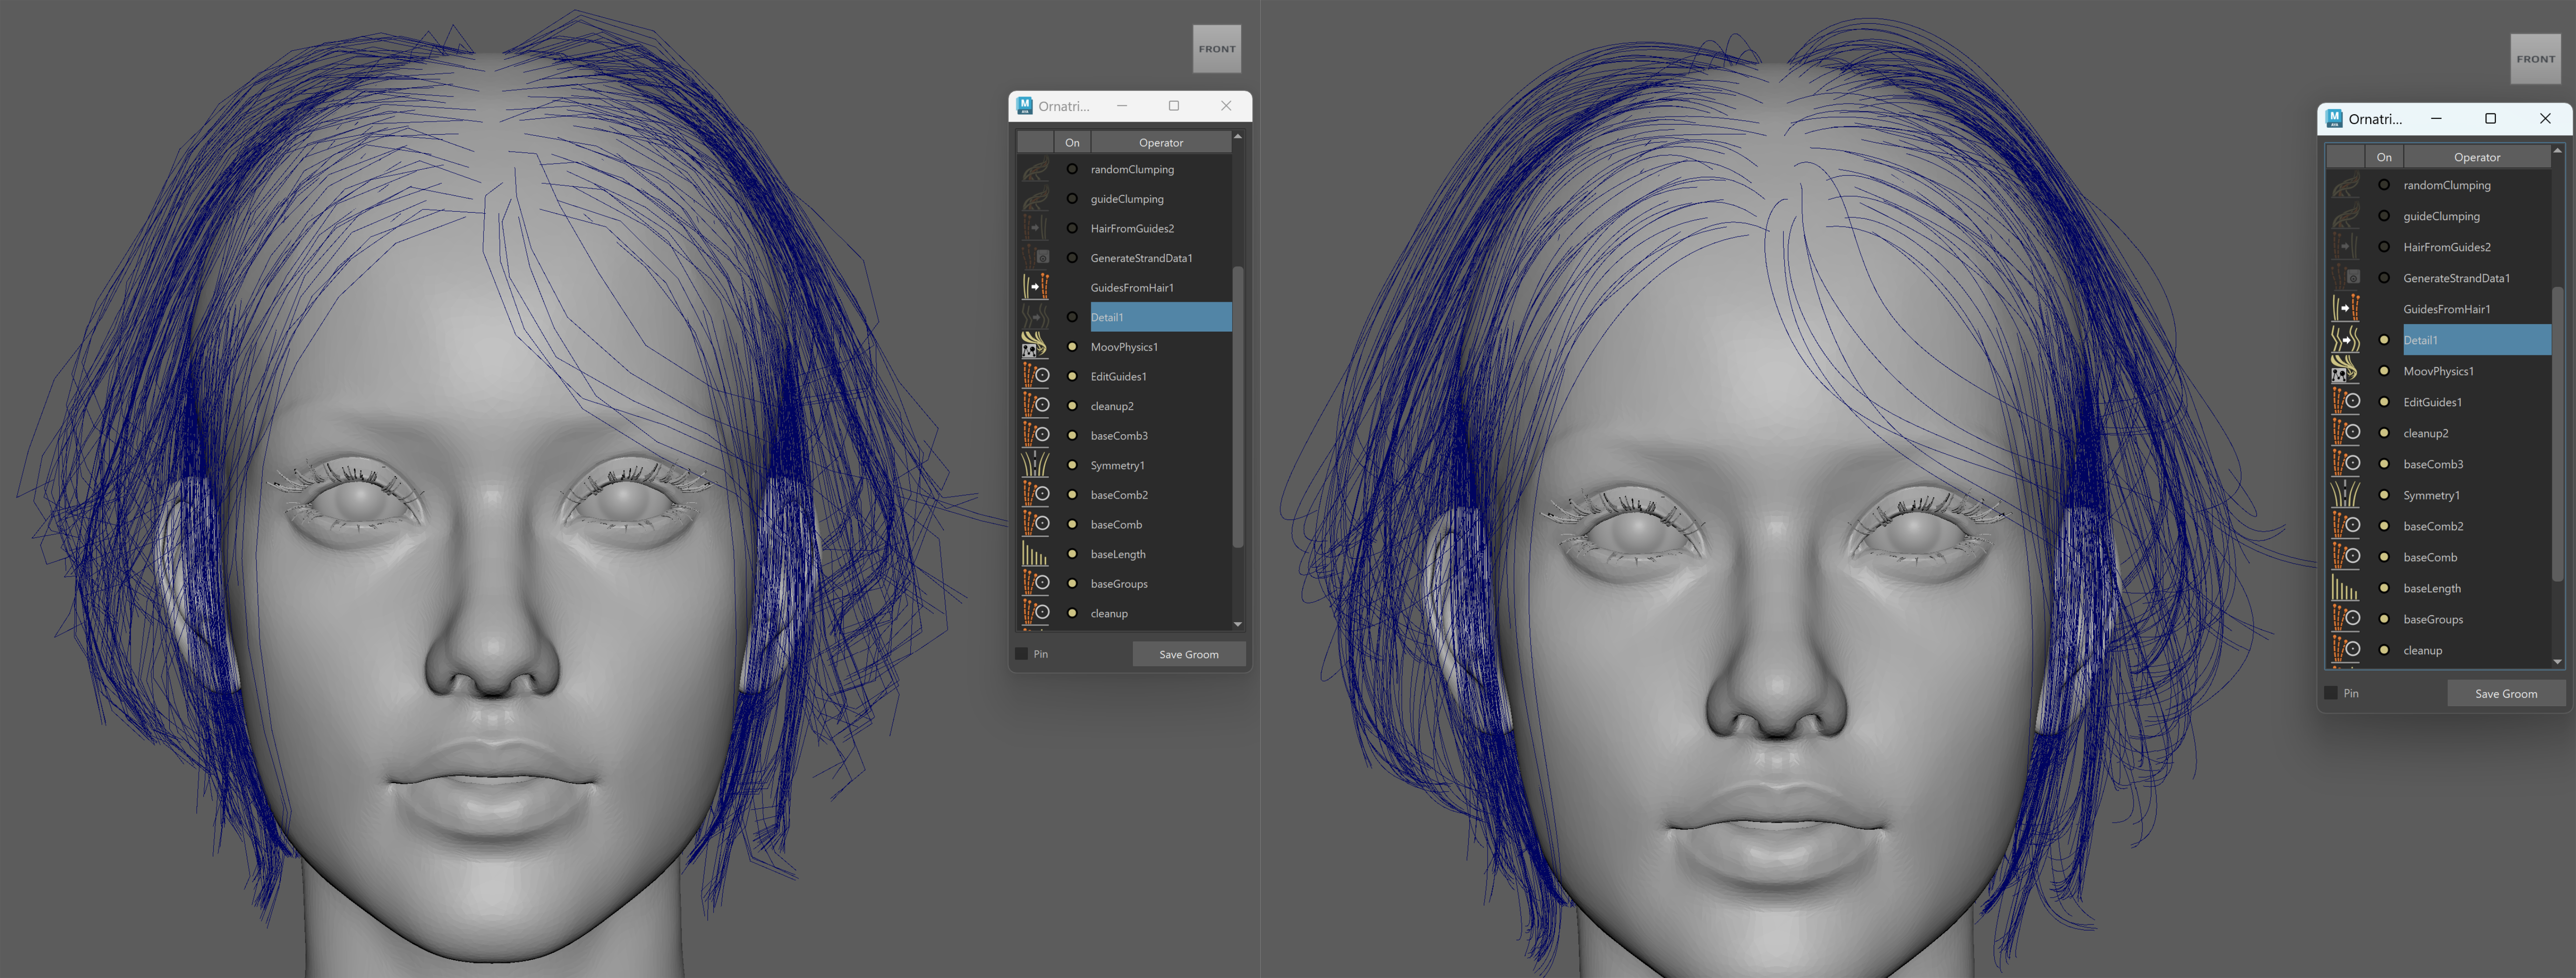
Above Moov, I have a Detail operator that increases the number of vertices after the simulation. This gives us smoother final curves without increasing the cost of the simulation itself.
Preventing Strand Stretching
When simulating guides with Moov, you may notice that the strands become longer or stretch under forces such as gravity or wind.
Moov works best when each simulated guide has a moderate number of vertices. As a practical guideline, around 20-40 vertices per guide is a reasonable range. Using more than approximately 50 vertices per guide is generally not recommended and can make it more difficult for the simulation to preserve the original strand length, and arround 100 you may start getting artifacts along the guides.
If your guides contain many vertices, use a Detail operator before Moov to reduce their resolution for the simulation. You can then add another Detail operator after Moov to increase the resolution again and produce smoother final curves.
If some stretching is still visible, enable Limit Stretch in the Moov hair model settings. This adds additional constraints specifically designed to reduce strand stretching.
For guides with a relatively high number of simulation points, you can also try enabling Long Range Layers. These constraints connect points that are farther apart along the strand, helping preserve both its length and overall shape. Use Long Range Stiffness to control how strongly these constraints affect the guide.
A good workflow is therefore to keep the simulated guides as simple as possible first, and use Limit Stretch or Long Range Layers only when additional shape or length preservation is needed.
Inserting the Detail operator above Moov and increasing the guide resolution to 60 points can noticeably change the Moov simulation and introduce stretching.
Keeping the simulated guides within a moderate point count generally produces more stable results. The following demo shows the difference between simulating 10 points per-strands vs 60 points.
Guide Stretching
Loading the Wind Simulation Script
We are now ready to start the simulation.
Select the Moov operator to display its parameters in the Attribute Editor.
In the Scripts section, load HairSimulatorWind.py into the Python File field.
This file is included with Ornatrix and is normally located in:
C:\Program Files\Ephere\OrnatrixMaya2026\scripts\Moov\HairSimulatorWind.py
The same directory also contains the default Moov script in case you need to restore it later.
After loading the file, a new parameter section called Wind will appear.
Enable Use Wind and press Play on the Maya timeline to run the simulation. You should see the hair moving smoothly with the wind toward the right.
The Wind parameters are simple and allow you to control the wind velocity on each axis, as well as friction and turbulence.
Animating the Wind
The default Wind Velocity X value is 200.
If we increase it to 400, we can immediately see a considerable increase in the wind force toward the right.
To make the simulation more interesting, we can animate Wind Velocity X. For example, changing the value over time using values such as 200, 80, 800, 100 creates sudden changes in wind strength and produces a more dynamic result.
Simulation result without collisions
Adding Collisions
We are still missing collisions. At this point, the guides can pass through the character.
In Moov, go to the Collision Objects section. Use the + button or right-click to add the mesh you want the hair to collide with.
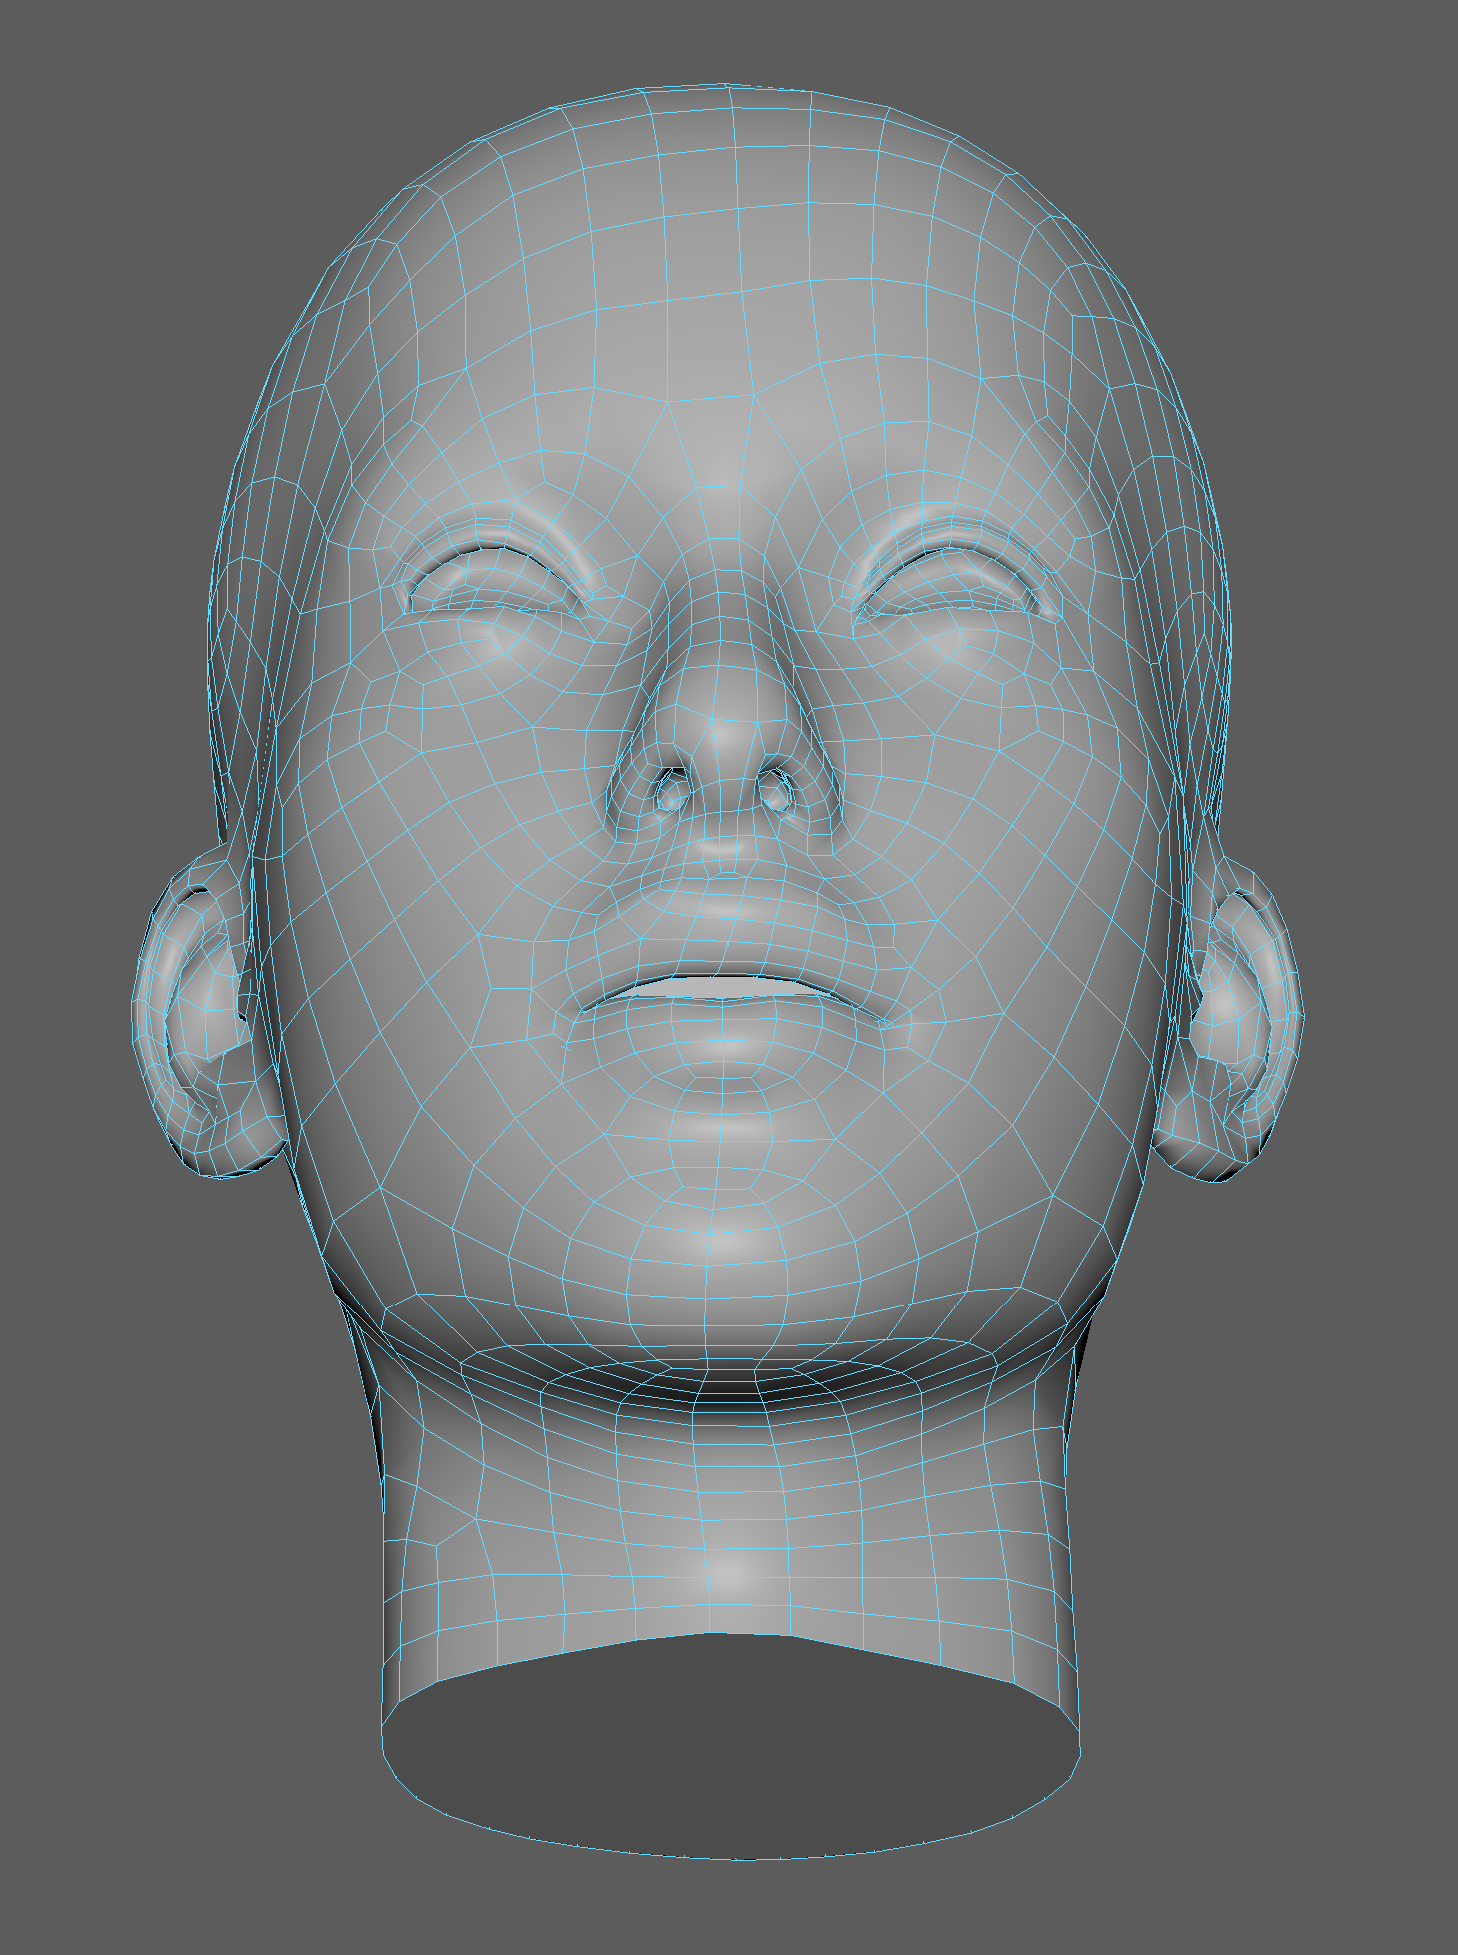
In this example, the collision mesh is a simplified, lower-resolution version of the character's head with all holes closed.
Using a closed mesh helps avoid collision problems around open borders, where strands may become stuck or pass through the surface.
A lower polygon count also improves simulation performance considerably. Ideally, the collision mesh should only represent the general silhouette and shape needed for the hair collisions. It does not need to reproduce every small detail of the final character. This makes iteration much faster because the simulation has less geometry to process.
Collision Settings
Go to the Collisions section and make sure Collide With Meshes is enabled. It is enabled by default.
In the same section, Particle Radius controls the collision width around each guide or strand vertex.
You can also vary this width along the guide using Particle Radius Curve.
A Particle Radius of 0.6 works well in this case.The correct value depends on the scale of your scene, so try different values until you find one that works for your groom.
This is the result with collisions enabled:
Simulation result with collisions
Preserving the Original Hairstyle
Another thing you may notice is that the simulation can change the original hairstyle considerably.
Ornatrix provides the Attract To Initial Shape option in the Forces and Fields section of Moov to help preserve the original groom.
Enable Attract To Initial Shape and adjust Attract To Initial Shape Stiffness.
The goal should be to find a balance between allowing the hair to react naturally to the simulation and preserving the original hairstyle. A value too high will make the hair too stiff.
Experimenting with Gravity and Drag
In some cases, it can also be useful to disable gravity completely by setting the Gravity parameter to 0.
Reducing or removing gravity can help isolate the effect you are trying to create.
For example, with some adjustments we can create a variation that resembles hair moving underwater.
- Gravity:
0 - Drag:
0.2
Experiment with these parameters to create different types of motion.
Simulation with underwater effect
Simulating Specific Hair Regions
It is not always necessary to simulate the entire hairstyle. In many shots, only a specific area of the hair needs secondary motion.
Strand Groups can be used to divide the groom into different regions and restrict the Moov simulation to only the guides you need. For example, you could create separate groups for the front, sides, and back of the hairstyle, and simulate only the region that needs additional movement for a particular shot.
After assigning Strand Groups to the guides, use the Strand Group parameter in Moov to specify which group or groups should participate in the simulation. Guides outside the selected groups remain unaffected by Moov.
This can be especially useful for shot-specific simulations. Instead of creating a single simulation that has to work for the entire hairstyle in every situation, you can create different Moov setups for different parts of the groom depending on the requirements of the shot.
It also reduces the amount of hair that needs to be simulated, making it easier to configure, preview, and iterate on the result.
The following example uses Edit Guides to create a new strand group for the guides to the right half of the groom(showed in green) 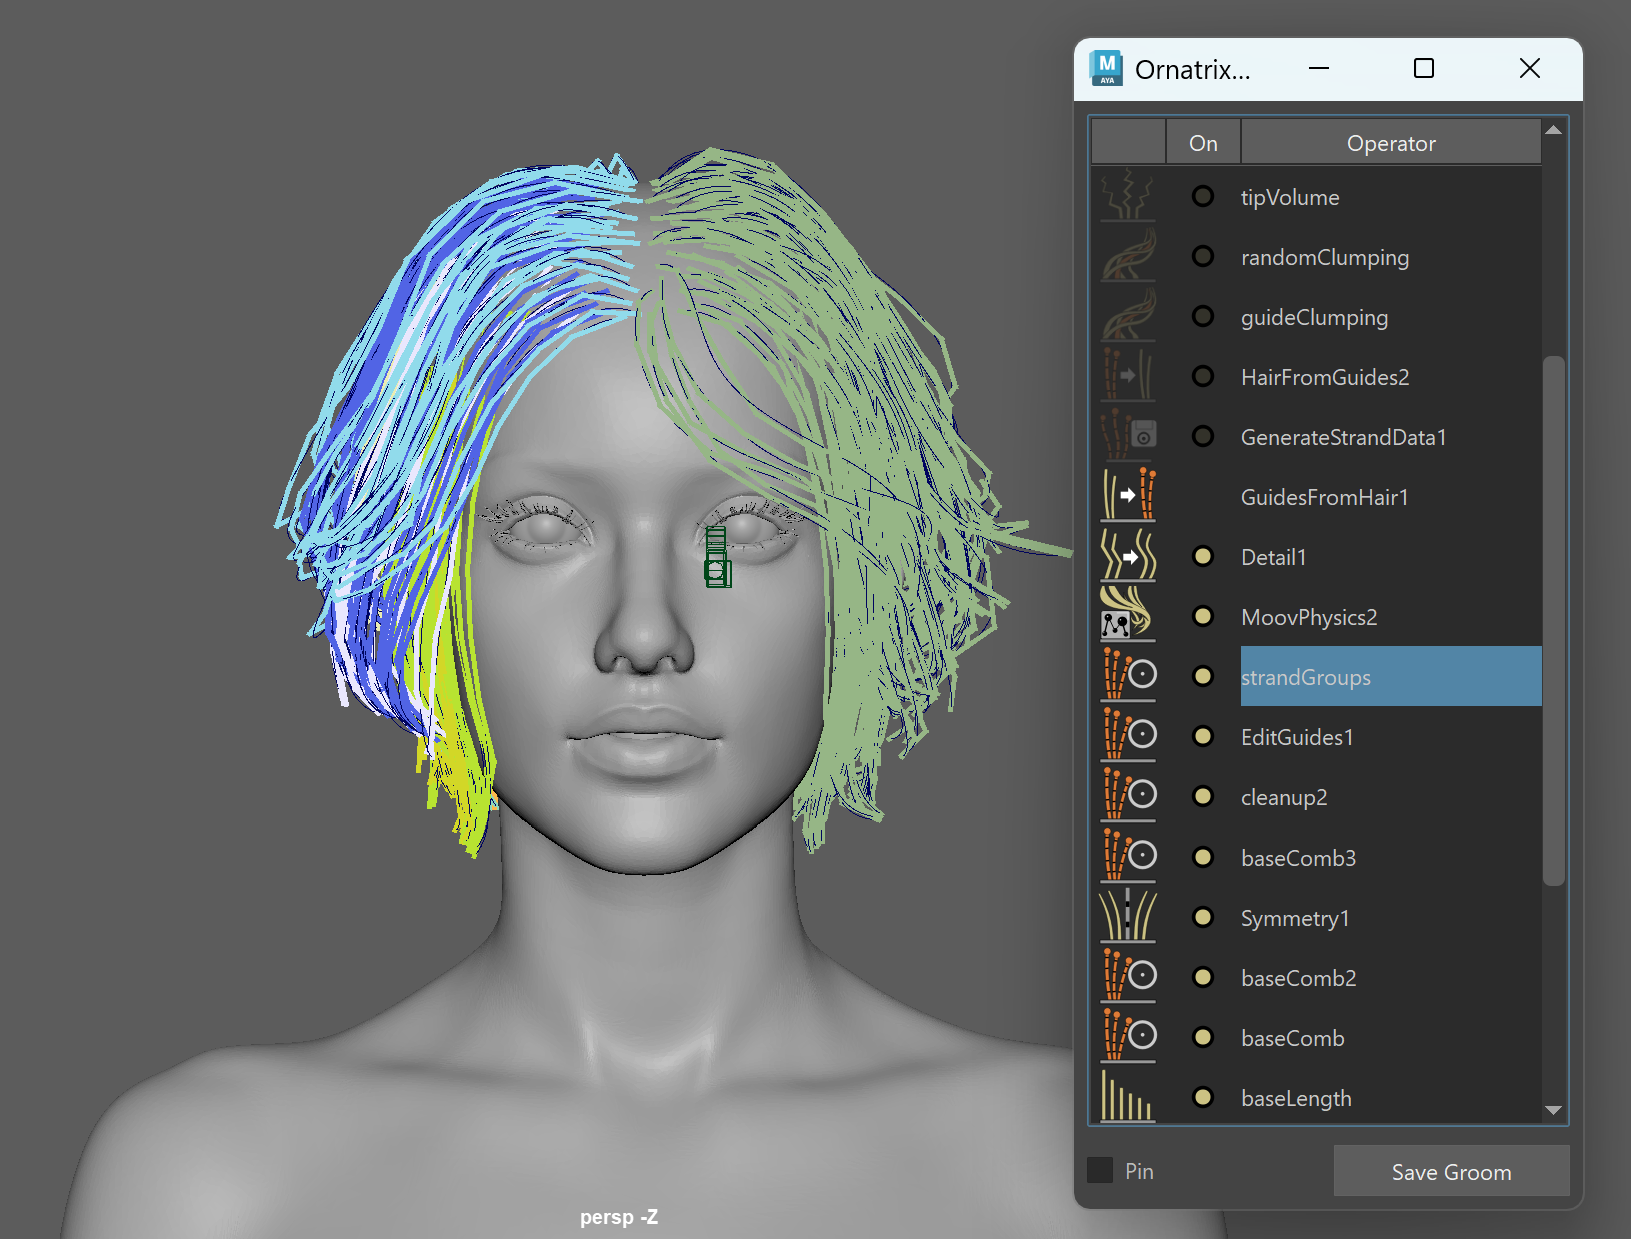 Simulation isolated to a group os strands
For more information about creating and combining groups, see Working with Strand Groups.
Reviewing the Simulation with Cached Playback
While tuning the simulation, Maya's Cached Playback lets us scrub back and forth without re-running Moov. In Maya's Preferences, set Evaluation mode to Parallel on the Settings > Animation page, then turn on Cached Playback. Play the scene once from the start: besides the regular cache line, Maya shows a separate dynamics cache line under the timeline, which fills forward from the first frame in the background.
Once a frame is cached, scrubbing to it shows exactly the hair that playback produced. Scrubbing to a frame that is not cached yet keeps the hair still until the background pass reaches it, because each simulated frame depends on the previous one. Changing a Moov parameter discards the dynamics cache and the pass starts again from the beginning of the range.
The same applies to the Oscillator and AI Animator operators, to Push Away From Surface with Preserve State on, and to Resolve Collisions with Preserve Rotations on.
Cached Playback is for reviewing the simulation inside the current Maya session. To keep the result, render it, or reuse it in another scene, bake it as described below.
Baking the Simulation
Once we are satisfied with the result, we can bake the simulation to a file that can be reused with the groom.
To bake the simulation, add an Animation Cache operator above Moov and select it to see its properties.
In File Name, use the save button to specify the output file and directory.
Record Render Hair
In the Recording section, enable Record Render Hair when Animation Cache is placed above Hair from Guides or another operator that uses different viewport and render settings. For example, Hair from Guides provides:- Render Count - Number of strands used for the final render.
- Viewport Count Fraction - Percentage of those strands displayed in the viewport.
If Record Render Hair is enabled, Animation Cache records the complete render hair instead of only the reduced viewport representation.
Another example is the Detail operator, which can use different point counts for the viewport and final render.
In our case, we do not need Record Render Hair because Animation Cache is only recording the guides. The Detail operator is above the cache, so its render-specific settings do not affect what we are recording.
Recording Range
The Use Record Time Range option tells Animation Cache to use the animation range configured in Maya's timeline. If disabled, you can manually specify the first and last frame that should be recorded. This option is enabled by default.
For more information about the remaining Animation Cache parameters, see Animation Cache.
Recording the Cache
Finally, press Record Animation and let the recording complete.
Animation Cache records the simulation and automatically loads the resulting file.
You can now disable or remove Moov because the Animation Cache operator contains the recorded simulation.
Reusing the Cached Hair
The resulting file contains more than just the animation. It also stores the guides or strands and their associated data, including Strand IDs and Strand Channels.
You can import this file into a new Maya scene using:
File > Import
Set Files of Type to Ornatrix Alembic and select the recorded file.
When imported into a new scene, Ornatrix creates a groom containing a BakedHair or BakedGuides operator.
You can assign a distribution mesh in the operator properties and continue editing the imported strands or guides using other Ornatrix operators.
However, strands imported this way are static.
To restore the recorded animation, use an Animation Cache operator and load the same cache file into its File Name parameter. The Animation Cache operator will then apply the recorded animation to the baked strands.
Files Used
This tutorial uses the Layered Bob Hairstyle sample groom.
- Layered Bob Hairstyle Maya project - Contains the Maya scene, groom, textures, and required project files.
- Simulation Caches - Contains the pre-recorded Ornatrix Alembic animation caches used for the wind simulation examples.
The files can be downloaded from the Layered Bob Hairstyle sample page:
Layered Bob Hairstyle
The sample requires Maya 2026 and Ornatrix 5.2.0.39751 or newer.