


 Edit Guides Modifier
Videos
|
Edit Guides detailed walk-through (Russian with English subtitles) |
Working with hair partings |
|
Detailed exploration of styling tools (Russian wit English subtitles) |
Overview
Edit guides is a modifier created for the sole purpose of modifying sparse state of hair. Here the user is presented with a toolset that allows easy and intuitive manipulation of hair. This modifier is broken down into three main sections (or levels) of guide editing. Using these three methods together should allow you to produce any arbitrary hair volume shape, which can then be fine-tuned using hair state modifiers.
Guide Settings
This rollup provides settings for dealing with guides in this modifier. It allows hiding or freezing specific guides and putting the modifier into of three editing modes. This rollup will remain visible even when the modifier is inside the root, strand, or brush editing mode.
- Hide Button
Hides selected guides inside the viewport. This is useful for isolating just a few guides for editing or generally removing some specific guides from view temporarily. - Unhide All Button
Unhides all guides making them visible inside the viewport. - Freeze Button
Makes selected guides not selectable inside the viewport. This is an alternative to hiding them and allows to temporarily prevent certain guides from being editable. - Unfreeze All Button
Makes all guides selectable and editable inside the viewport.  Roots Button
Puts this modifier into root editing mode Strands Button
Puts this modifier into strand editing mode Brush Button
Puts this modifier into brushing mode- Cull Back-Facing Roots
When this option is on, any strands which are currently facing away from the viewport camera will not be editable. - Hide Back-Facing Roots
When this option is on, any strands which are currently facing away from the viewport camera will be hidden. - Show Vertex Ticks
When this option is on, every single guide vertex will have a small tick drawn on top of it. This can be useful to see the detail of each guide. - Hide Guides Gizmo
When this option is on and "Show End Result" option of Max's modifier stack is also on, the edit guides will not draw the guides inside the viewport. This might be useful to see brushing effects directly on the hair without seeing the guides.
Channel Manager
This rollup appears only when the modifier is in object mode. It can be used to create or remove guide channels. Channels inside an edit guides modifier are created non-destructively. This means that any channels already existing before the modifier is applied will not be affected if this modifier is later removed. However, existing channels can be removed by this modifier down the modifier pipeline.
Parameters
- Current Channel
Provides a list of channels from which you can select a channel to delete. - Add
Adds a new per-root or per-vertex channel with a specifiable name. The added channel will only exist as long as the modifier which created it exists in the stack and is turned on. - Remove
Removes the guide channel currently selected in the current channel drop down.
Root Level
Strands are edited according to their root. This implies that every strand is treated as its own solid component
Root portion of edit guides is designed around the workflow of dealing with hair roots. There are some fundamental concepts that usually apply to roots such as roots are always located relative to either a surface or object. In most uses, you will deal with roots that are located relative to faces.
In the root level you have the tools to plant, remove, and manipulate roots in both object space and surface space. You also have the option to modify guide channels at the root level. Modifying channels at root level in edit guides is referred to as changing guide groups. That is because beside tweaking actual value you can quickly assign an integer number to each channel, much like changing face group id's in edit mesh or edit poly.
Selecting and Moving Roots
You can select and deselect roots inside the viewport like you would vertices, faces, or edges on a mesh using standard 3ds Max selection tools.
Once selected, you can use 3ds Max transform tools to move the guides along the surface of the current distribution mesh. This may be needed to tweak the exact position of guides after they were automatically generated by Ornatrix.
Root Soft Selection
Similar to polygon modeling soft selections, this feature allows you to select one strand root and have multiple strands around it also affected. The amount by which neighboring strands are affected can be defined in this rollup.
Please note that soft selection uses the distribution object's texture (UVW) coordinates to calculate the distance between strands. Therefore, it is important that the distribution mesh has well formed texture coordinates for this feature to work.
- Use Soft-Selection
Turns soft selection option on or off - Neighbours
Specifies the number of strands next to directly selected roots which will be also selected. - Max. Distance
Specifies the maximum distance from directly selected roots at which soft selected strands will still be affected. The selection strength will be attenuated away from directly selected roots according to this distance. In other words, this specified how far the selection will reach.
Root Operations
This area allows creation and removal of guides from current hair object.
- Plant
This button, when pressed, will allow you to click on the distribution mesh for current hair to plant a new guide at that location. - Remove
Press this button to remove currently selected guides. - Num. segs
When you are planting a new strand (straight or interpolated), this option is responsible for allocating a specific number of points. It is a recommended practice to set this to be the same number of points as all other guides in the current hair object. - Interpolate Strands
When on, the newly planted root will use the surrounding guides to define its shape. Use one of the three interpolation modes right below this checkbox to define the type of interpolation to use. If this option is off, a straight guide is planted.
Channel Groups
This area provides controls to work with group guide channels. Group channels are normal guide channels which hold an integer value (0, 1, 2, 3, etc.). These values can later be used to separate guides into groups. For example, all guides with a channel value of 1 would be part of group 1. Guides with channel value 2 would be part of group 2, and so on. These groups can, for example, be used to define partings inside the hair from guides modifier.
- Group Channel
Shows all guide channels present in current object. Allows to select the channel to edit using the controls below. - New Button
Creates a new group guide channel - Group manager channel mode
When this option is on the guide color is controlled by its current channel. Channel can be changed in the channel drop down. Guide color varies from 0 (black) to 1 (white). Channel values above 1 are clamped to white.
Similar to the option above, this option makes the current guide color be controlled by its assigned group. Groups are integer values (instead of floating point) assigned to channels which are used in components such as hair for guides for partings. Each group is displayed using a random color. - Chan. Value
Changes the value of the current channel for selected guides to the value currently inside this spinner. You can also click any of the buttons below to set this channel value to an integer displayed on each button.
Strand level
IK solver is used to manipulate strands based on position of control points
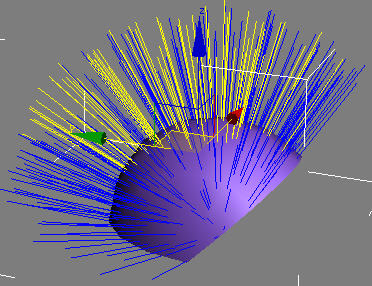
Strand level deals with everything related to the direct manipulation of strand shapes. The term direct manipulation in this case means editing of strand vertices much like you would edit vertices of a mesh. Of course doing that alone would be a nightmare; that is why a set of tools is introduced to organize these strand vertices and manipulate them in a very intuitive manner.
A special IK solver system is used to simplify the task of moving strands. The reason for an IK system is to preserve strand length while editing. Human hair has a very high strength ratio and thus virtually doesn't stretch along its direction. Note that even if you do want hair to stretch (for example if you're doing a length variant hairstyle and would like to form both shape and length at the same time), there's an option to turn IK off and deal with stretching as well as moving. You can also make hair IK history-independent, which sometimes provides more intuitive behavior.
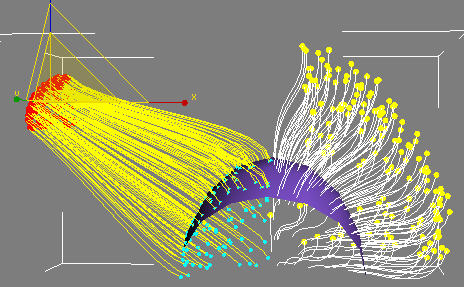
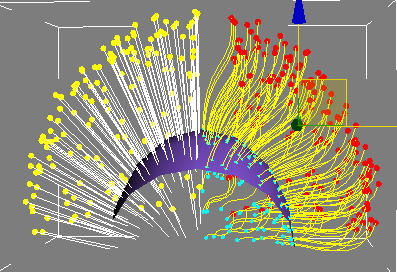
Using control points hair can be pulled and manipulated using rotate, move, and scale tools
To manipulate strands special helpers are used- control points. Control points can be thought of as vertices located somewhere on hair. Like other vertices in 3ds Max they can be moved, rotated, and scaled individually or as a group in all transform spaces (world/object/screen etc.). You have the full control over the position of control points along the strand and the influence that they have on each strand.
Additional functionality is available such as braiding tools, cutting, and importing external splines. You are also presented with a move to quickly change control point position and influence, but how you assign or use that mode is up to you.
Parameters
- Use Strank IK
Controls whether control points act as IK solvers or as deformers - IK Interations
Determines how many times IK solver will iterate before converging on a solution. Generally the higher this value is the slower IK solver will act.
Brush level

Move brush followed by a rotate brush is applied to intuitively comb the hair into desired shape
Hair brushing is a special mode in Ornatrix that provides a very intuitive and interacting way of modeling hairstyles. You are given tools much like a real hair dresser. You can comb, cut, braid, paint, and perform many other interactive tasks that indirectly manipulate hair.
Brushing level consists of a set of brushes each carrying its own specific function and task. All brushes have similar behavior.
To use a brush, simply click and drag inside the viewport. You can see the affected region outlined by a red shape (which can be set in brush settings). Whatever is inside this region will get affected by the brush. You can specify to attenuate this affection closer to the edges or choose to have the region affected the same everywhere.

Hair is cut using a cut brush
You may change the brush size by shift+drag. You will see the outline growing or shrinking to reflect the new brush size.
Brush strength can also be changed by pressing Ctrl+Shift+Drag. Brush strength will be reflected in the color of the brush outline, red being the strongest (1.0) and yellow being the weakest (0.0).
Ctrl and Alt buttons are reserved for brush-specific behavior.
Select brush
Use select brush to simultaneously select a number of strands. Strand selection can then be used in conjunction with other brushes to limit the number of editable strands to selection. This can be useful if you want to, for example, only edit a certain chunk of hair on the head at a time without worrying about messing up nearby hair.
Drag move to make a new selection while deselecting old strands. Ctrl+drag move to add new selection to previous selection. Alt+drag move to subtract new selection from previous selection. Click in an empty region on the screen to deselect all strands.
Note that selection brush will also do soft-selection if specified.
Move/Rotate/Scale brush
This brush is designed to intuitively change the shape of hair based on the flow of user's mouse movements. Move brush in particular will act as a real brush, changing the strands' orientations locally as you 'touch' them. Scale and rotate brush will take a point of reference (where you first clicked) and either move hair away/to it (scale brush), or rotate it around in clockwise or counter-clockwise manner.
You can comb along the surface of your model with move brush by holding down Ctrl while dragging your mouse.
Tip: When beginning a hairstyle it is a good idea to comb out the general hair shape. To do this, set the back-face culling off, resize the brush to be roughly the hair size and comb the whole set of hair in desired direction. Once all the hair are shaped uniformly, you can decrease the shape and start adding fine detail to the hairstyle.
Tip: It is generally a good idea to have back-face culling on while you're combing your hair. Having this option off will result in hair on both sides of the head/model to be affected (which is usually undesirable).
Tip: The bigger the brush setting, the less smooth your strokes will shape the hair. The advantage of having high strength is to see direct and effective result. However, if you want smoother result and don't mind combing hair over again a couple of times, use a smaller brush strength (0.5-0.6).
Cut brush
This brush will try to simulate the way a hairdresser would cut hair. Simply point and click to where you'd like hair to be cut and the hair will be trimmed to the extents of current brush's edges.
Tip: Rectangular brushes can be more useful while cutting hair since in most cases hair is trimmed to either a horizontal or vertical reference planes.
Tip: Some hairstyles involve hair thinning. During hair thinning, nearby strands are cut to different lengths, thus producing tips that are not uniformly stretched out for each hair cluster. To achieve this, messy brush can be used. Messy brush will cut nearby strands in a non-linear form thus effectively thinning the hair.
Grow/Shrink brush
Like the name suggest the grow/shrink brush increases and decreases length of affected strands based on user mouse movement. Upward movements will increase the length of strands while downward movements will shorten the strands. Note that hair will retain the original strand approximation when they're re-sized just like with all the other brushes.
When you decrease the length of hair it will still remember its shape so if you start increasing it the original curvature is restored. This is only valid while you're dragging your cursor; as soon as you let the cursor go the new shape is remembered.
Ornatrix uses the last tangential hair direction to determine the shape of strands that are increased beyond their original length. This means that if you want to lengthen the strands beyond their original magnitude they will extend in direction their tips are pointing to.
Paint Brush
Paint brush is designed to work solely with guide channels. It acts like a spray paint can to alter the values of currently selected vertex or root based channel(s). You can control the values of up to three consecutive guide channels at the same time. This can be useful if you want to paint RGB channel sequence for example, and want to do so with seeing real time results.
By default the brush will add to the value of current channel. If show end result option is on and something above in the pipeline depends on the channel being edited you will see real time change in the hair. Use the grab'n'pull option to be able to alter values by dragging up or down- much like a spinner control behaves.
Smooth Brush
Use this brush to relax the shape of the affected guides. It will average the curvature of guides as you are brushing them to allow for smoother features.
Revert Brush
Use this brush to restore the affected guides to the shape they had before the current Edit Guides modifier was applied. This brush will bring the shape of each guide back to what it was before current modifier was applied.
Parameters
- Brush size
Makes the affected area by current brush bigger or smaller - Brush strength
Makes the brush effects softer or harder. This depends on the type of brush you're using. - Affect selected only
If this option is on, only selected guides will be affected while brushing. - Affect by roots only
When on, only those strands who's roots happen to be under the brush when the brush is clicked will be affected. - Respect vertex weights
Will use vertex selection guide channel to strengthen/soften brushing effect.
Braiding
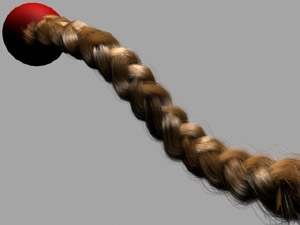
A 3-clump pigtail braid is formed from 6 guides
One of the key ornaments that distinguish human hair are human-made patterns in hair known as braids. Braids are created for many reasons- as ornaments, to make hair stronger, to get better control of where hair ends up being, and to separate dense hair into groups. Ornatrix provides a mechanism for creating braids, located in strand sub-object mode of the edit guides modifier. user is presented with options to create custom braids or choose from a list of presets. A special generator is also presented to quickly generate three different braid types with arbitrary parameters.
Every braid consists of N clumps and a stem. Clumps can be thought of clusters that form the braid, while the stem is the path along which the braid is laid out. Stem and clumps are automatically generated by averaging the shapes of selected guides.
Once you have braided your hair you should separate guides in each braid clump into their own hair partings. Furthermore you may wish to add a guide clustering modifier to make braided hair stick close to the guides. Using wisp option with a little twist generally gives good results.
Parameters
- Num. clumps
Number of clumps in current braid. - Current clump
The clump who's parameters are being edited. - Zenith, azimuth phase, frequency
If you cut a braid through a side and look at the cross-section, you will get a plane. Assume that X axis on this plane is zenith, Y axis is azimuth, and the normal to the plane (direction of braid) is Z axis. These parameters control the sinusoidal properties of XZ and YZ dimensions of each clump. - Global clumping
If there are more guides provided than clumps in current braid, this parameter controls how much these guides are attracted to their respective clumps. Note that each guide is assigned to a clump randomly. If there is same number of guides as clumps, this parameter does nothing. - Global size
The azimuth/zenith dimensions of the braid. This is same as braid's radius. - Azimuth scale
If you wish to scale a braid's radius non-uniformly (width not same as height), this controls the azimuth to zenith ratio. - Axis rotation
Controls the twist that braid undergoes around its stem. - Custom coefficient
When generating a custom braid type (not fish or pigtail), this parameter controls to sine function along the zenith. Different values will generate different shapes for the braid. A value of 2 with common braids usually prevents clump overlap.
Named Selection Sets
Edit Guides modifier supports working with sub-object named selection sets. Simply select a few guides or roots and use 3ds Max's named selection set drop down box in the main toolbar to define a new selection set. You may later recover this selection by selecting the name you entered from this drop down.
C++ SDK Access
Edit Guides modifier is accessible via the C++ SDK. You need to get an instance of EditGuidesModifierFPInterface which exposes numerous methods:
#include "Public\EditGuidesModifierFPInterface.h"

// Get "Ground Strands" interface:
auto editGuidesInstance = EditGuidesModifierFPInterface::GetInterface( myModifier );
MaxScript Access
You can access Edit Guides modifier via its MaxScript interface. For example:
-- Get MaxScript interface
editGuidesInstance = $MyHairObject.modifiers[#Ox_Edit_Guides]
You can call the following functions on this interface to manipulate Edit Guides programatically:
-- Puts Max into "Create Root" mode where user can plant new guides on top of the distribution object
editGuidesInstance.CreateRoot()

-- Puts Max into "Import Spline" mode where user can pick a spline object to be added as a guide
editGuidesInstance.ImportSpline()

-- Puts Max into "Control point change" mode where user can select where on a guide they want control points to be positioned
editGuidesInstance.CPChange()

-- Cuts all selected strands at the current position of control points. The new tips will be at the control points.
editGuidesInstance.CutStrands()

-- Creates a braid out of selected guides using the current braid configuration
editGuidesInstance.BraidStrands()

-- Captures the current guide shape from the top of the stack into this modifier. Guides will be edited to look like current modifier stack result.
editGuidesInstance.AdoptFromStack()

-- Sets the type of current brush.
-- brush The brush type to set. 0 - Select, 1 - Move, 2 - Rotate, 3 - Scale, 4 - Cut, 5 - Grow/Shrink, 6 - Paint, 7 - Grab, 8 - Smooth, 9 - Revert
editGuidesInstance.SetBrushType type

-- Gets the type of current brush. 0 - Select, 1 - Move, 2 - Rotate, 3 - Scale, 4 - Cut, 5 - Grow/Shrink, 6 - Paint, 7 - Grab, 8 - Smooth, 9 - Revert
type = editGuidesInstance.GetBrushType()

-- Sets the width and height of the current brush. Height parameter is only relevant when shape is rectangular
editGuidesInstance.SetBrushSize width height

-- Gets the width or radius of the current brush
width = editGuidesInstance.GetBrushWidth()

-- Gets the height of the current brush, when shape is rectangular
editGuidesInstance.GetBrushHeight()

-- Sets the shape of the current brush. 0 - Circle, 1 - Rectangle, 2 - Messy
editGuidesInstance.SetBrushShape shape

-- Gets the shape of the current brush. 0 - Circle, 1 - Rectangle, 2 - Messy
shape = editGuidesInstance.GetBrushShape()

-- Sets the affect strength of current brush
editGuidesInstance.SetBrushStrength value

-- Gets the affect strength of current brush
value = editGuidesInstance.GetBrushStrength()

/* When in brushing mode simulates a click, drag, and release of current brush in the active viewport.
Use stepCount parameter to specify how many intermediate mouse movements to simulate.
*/
editGuidesInstance.DragBrush fromScreenCoordinate toScreenCoordinate stepCount

-- Gets whether only currently selected guides will be affected by brushing
value = editGuidesInstance.GetAffectSelectedOnly()

-- Sets whether only currently selected guides will be affected by brushing
editGuidesInstance.SetAffectSelectedOnly value

-- Gets whether only guides whose roots are under the current brush will be affected
value = editGuidesInstance.GetAffectByRootsOnly()

-- Sets whether only guides whose roots are under the current brush will be affected
editGuidesInstance.SetAffectByRootsOnly value

-- Gets whether vertex weights will determine how much brushing affects each vertex
value = editGuidesInstance.GetRespectVertexWeights()

-- Sets whether vertex weights will determine how much brushing affects each vertex
editGuidesInstance.SetRespectVertexWeights value

-- Gets the current selection level. 0 - Normal, 1 - Root, 2 - Strand, 3 - Brush
level = editGuidesInstance.GetSelectionLevel()

-- Sets the current selection level . 0 - Normal, 1 - Root, 2 - Strand, 3 - Brush
editGuidesInstance.SetSelectionLevel level

-- Marks specified roots as selected
editGuidesInstance.SelectRoots selection

-- Gets an array specifying selected roots
bitArrayValue = editGuidesInstance.GetSelected()

-- Gets an array specifying which roots are currently hidden
bitArrayValue = editGuidesInstance.GetHidden()

-- Hides selected roots, and unhides any previously hidden ones
editGuidesInstance.HideSelected unhidePrevious

-- Hides specified roots  and unhides any previously hidden ones
editGuidesInstance.HideRoots selection unhidePrevious

-- Unhides all roots in this object
editGuidesInstance.UnhideAll()

-- Gets an array specifying frozen roots
bitArrayValue = editGuidesInstance.GetFrozen()

-- Freezes selected roots, and unfreezes any previously frozen ones
editGuidesInstance.FreezeSelected unfreezePrevious

-- Freezes specified roots, and unfreezes any previously frozen ones
editGuidesInstance.FreezeRoots selection unfreezePrevious

-- Unfreezes all roots
editGuidesInstance.UnfreezeAll()

-- Gets whether the guides gizmo is currently hidden or visible
on = editGuidesInstance.GetHideGuidesGizmo()

-- Sets whether the guides gizmo is currently hidden or visible
editGuidesInstance.SetHideGuidesGizmo on

-- Gets whether backfacing roots will be selectable
on = editGuidesInstance.GetCullBackfacingRoots()

-- Sets whether backfacing roots will be selectable
editGuidesInstance.SetCullBackfacingRoots on

-- Gets whether backfacing roots are visible
on = editGuidesInstance.GetHideBackfacingRoots()

-- Sets whether backfacing roots are visible
editGuidesInstance.SetHideBackfacingRoots on

-- Gets whether each strand vertex is marked in viewport
on = editGuidesInstance.GetShowVertexTicks()

-- Sets whether each strand vertex is marked in viewport
editGuidesInstance.SetShowVertexTicks on

on = editGuidesInstance.GetAdditiveMode()

editGuidesInstance.SetAdditiveMode on

on = editGuidesInstance.GetScaleMode()

editGuidesInstance.SetScaleMode on

index = editGuidesInstance.GetCurrentChannelIndex()

isRoot = editGuidesInstance.GetCurrentChannelIndexIsRoot()

editGuidesInstance.SetCurrentChannelIndex index isRootChannel

-- Pops up a dialog to prompt the user to create a new channel
editGuidesInstance.AddChannel()

-- Creates a new guide channel
-- rootChannel If true a root channel will be created. Otherwise a vertex channel will be created.
-- name Name for the new channel
-- returns The index of the newly created channel or -1 if there was an error
editGuidesInstance.CreateChannel isRootChannel name

editGuidesInstance.DeleteCurrentChannel showConfirmDialog

mode = editGuidesInstance.GetChannelDisplayMode()

editGuidesInstance.SetChannelDisplayMode mode

/* Sets the value of specified channel for the selected entities
isRootChannel Determines whether to set root or vertex channel value
channelIndex Index of the channel for which to set value
value The new value to assign
*/
editGuidesInstance.SetChannelValueToSelection isRootChannel channelIndex value

/* Gets the shape of specified strand in object coordinates
strandIndex Index of the strand
returns Points, in object coordinates, defining the strand's shape
*/
points = editGuidesInstance.GetStrandShape strandIndex

/* Sets the shape of the specified strand to specified points in object coordinates
strandIndex Index of the strand
points A collection of points, in object coordinates, to assign to the strand
*/
editGuidesInstance.SetStrandShape strandIndex points

-- Gets the number of selection sets in this modifier
count = editGuidesInstance.NamedSelectionSetCount()

-- Adds a new named selection set based on current strand selection
-- name Name to assign the new selection set
editGuidesInstance.AddNamedSelectionSetFromSelection name

-- Deletes named selection set with specified name
-- name Name of the selection set to delete
editGuidesInstance.DeleteNamedSelectionSet name

-- Selects strands in specified named selection set
-- name Name of the selection set
editGuidesInstance.ActivateNamedSelectionSet name

-- Pushes out selected guides away from the distribution mesh
-- selectedGuidesOnly When false all guides are pushed out, otherwise only selected ones
editGuidesInstance.PushAwayFromMesh selectedGuidesOnly

-- Gets the position of control point for specified strand in object coordinates. Edit guide must be in modify panel for this to work.
pointCoordinate = editGuidesInstance.GetControlPointPosition strandIndex

-- Moves selected strand control points by a specified vector.
editGuidesInstance.MoveSelectedControlPoints moveVector

-- Plants a new guide at specified face and coordinate and interpolates it between neighbouring guides based on current settings
editGuidesInstance.CreateRootAtCoordinate faceIndex barycentricCoordinate

-- Gets the output guides of the Edit Guides modifier. These guides are not meant to be edited and should only be used as read-only.
editGuidesInstance.GetGuides()
Examples
You can find examples on usage of the edit guides modifier by examining the unit tests in Test_EditGuidesModifier.ms.