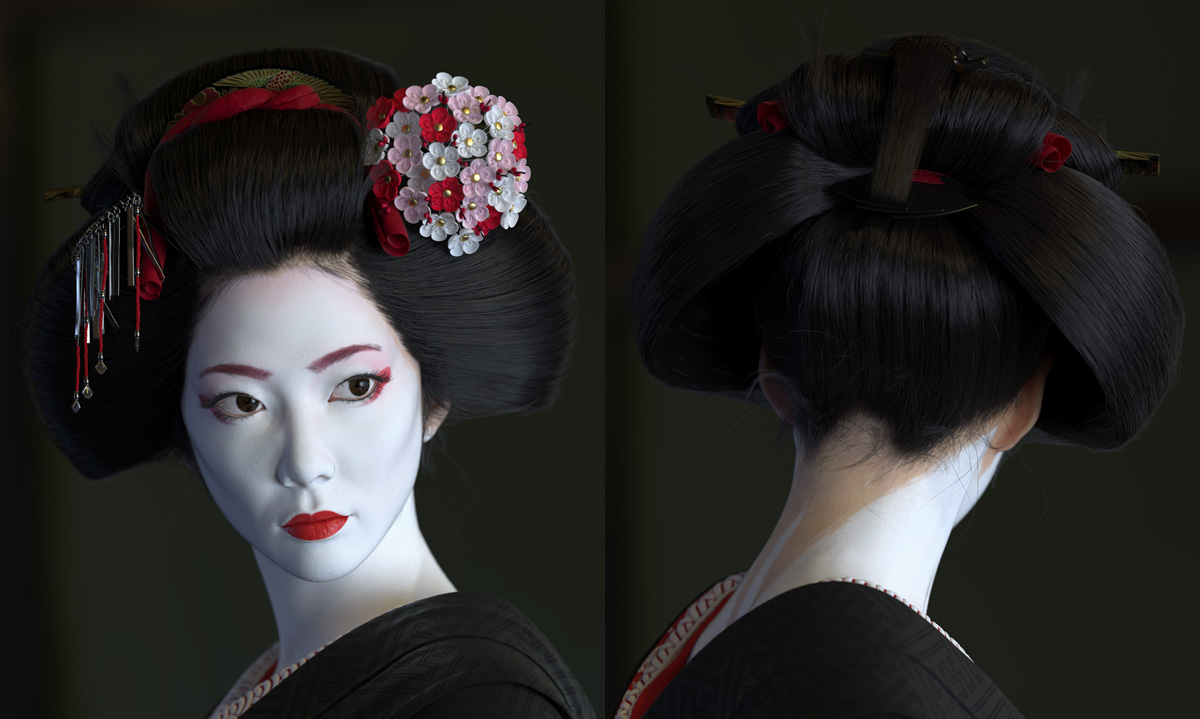
Making of Geisha by Lars Martinsson
Introduction
In this "making of" I will mainly focus on the creation of the groom and touch a little bit on the subject of shaders and lighting towards the end. Having a background as a modeler I enjoy an approach of converting meshes to Ornatrix hair systems in addition to the more traditional grooming. I find this technique especially useful when working on hair buns, complex braids or like in this case the hair style of a Geisha. The main part of the hair on this project was created in such a fashion, and that is what I will cover first.
Blocking and creating the bulk of the hair
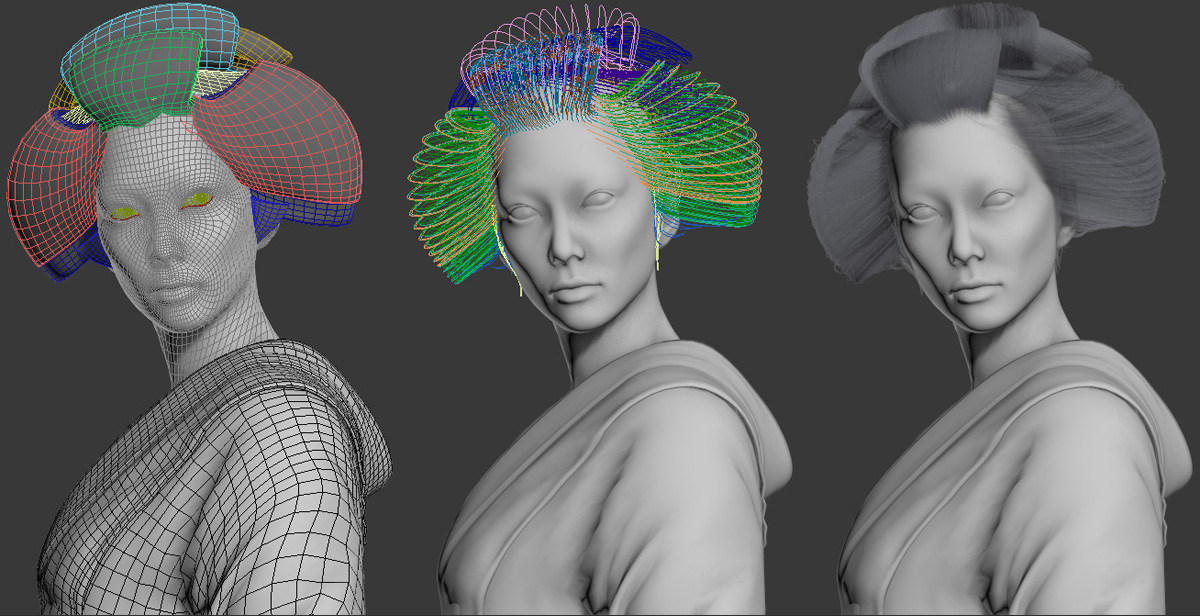
All the bigger shapes and forms of the hair of this piece was first blocked out as geometry, its edges later converted to splines and those finally hooked up to Ornatrix. As shown bellow.

When starting to block out I always try to keep it as simple as possible, and use the modifier stack to add complexity in a non-destructive way. With this part of the hair style I started out with single faced path in which I wanted the hair to flow, using symmetry so I only have to concentrate on one side. The edge loops following the flow of the hair are the ones that later will be converted to Ox Guides, so I make sure to keep the topology clean and simple with quads only.

Using a Shell with an Edit Poly modifier on top to give it thickness and refine its mass I still leave the door open to jump back to the single faced mesh to move things around if needed, and as long as I make sure not to alter the topology it shouldn’t mess to much with any changes done in the Edit Poly.
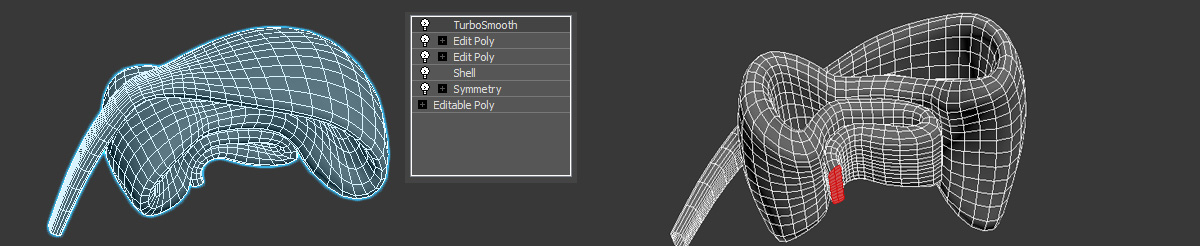
I often smooth the mesh once to make the flow more refined, and it also make it possible to work with a lower resolution in the earlier stages. Give the bottom and top of the mesh unique smoothing groups and tick the "Smoothing Groups" box in TurboSmooth modifier to leave them flat (the bottom part will later be used as a base for the groom).
I always make a copy of the mesh and put it in a hidden layer at this stage before moving on, the copy will be used if I ever want continue to iterate and make bigger changes again.

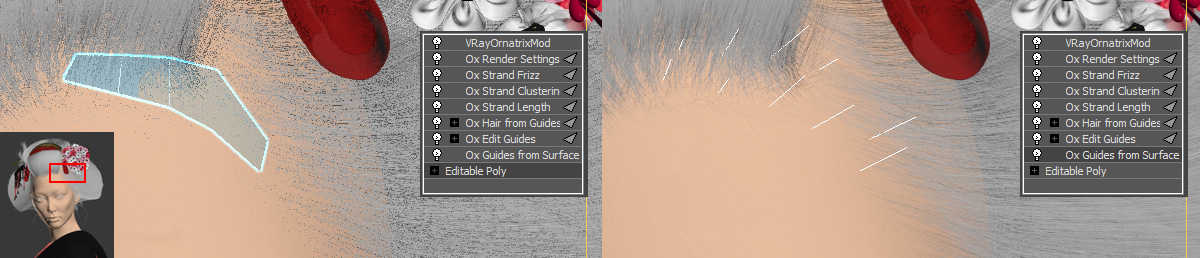
Select the end polygons of your geometry and detach them from the mesh, in this example I named it "hair_base_msh". Then select all the edge loops in the direction the hair will flow and convert them to splines, now all is set for Ornatrix.

Add an "Ox Guides from Shape" modifier to the splines and an "Ox Ground Strands" on top of that one, assign a Base Surface in this case the hair_base_msh we recently detached. Now its
a proper hair setup that could be groomed with regular"Ox Edit Guides" or any of the usual modifiers. In this case being already happy with the result, I moved on to converting the guides to Ox hair (Ox Hair from Guides). I also added an "Ox Render Settings" to give the new hair strands more of a correct thickness.

To make the hair more natural and irregular I always add an "Ox Strand Frizz", even straight hair will need imperfections to feel organic. Play around with the settings until you have something you like, use the Strand Frizz Editor if you want the behavior to change at certain hair length, and make sure to try out adding Outliers since that will quickly add an extra layer of complexity."Ox Strand Length" is another one i more or less always add, it will randomize the strands length and make the hair look more natural. Finally the piece is ready and can be test rendered in V-Ray, using the "VRayOrnatrixMod" and having a VRayHairMtl material assigned to it.
I would still often go back to the original hair block-out mesh and do mayor changes when iterating the look and form of the hair style. In a few minutes it can be converted to splines again and have the modifier stack copied over from the old iteration and be ready for test render again. Also when working on a new piece of the hair I would use the previous ones modifier stack as a base.
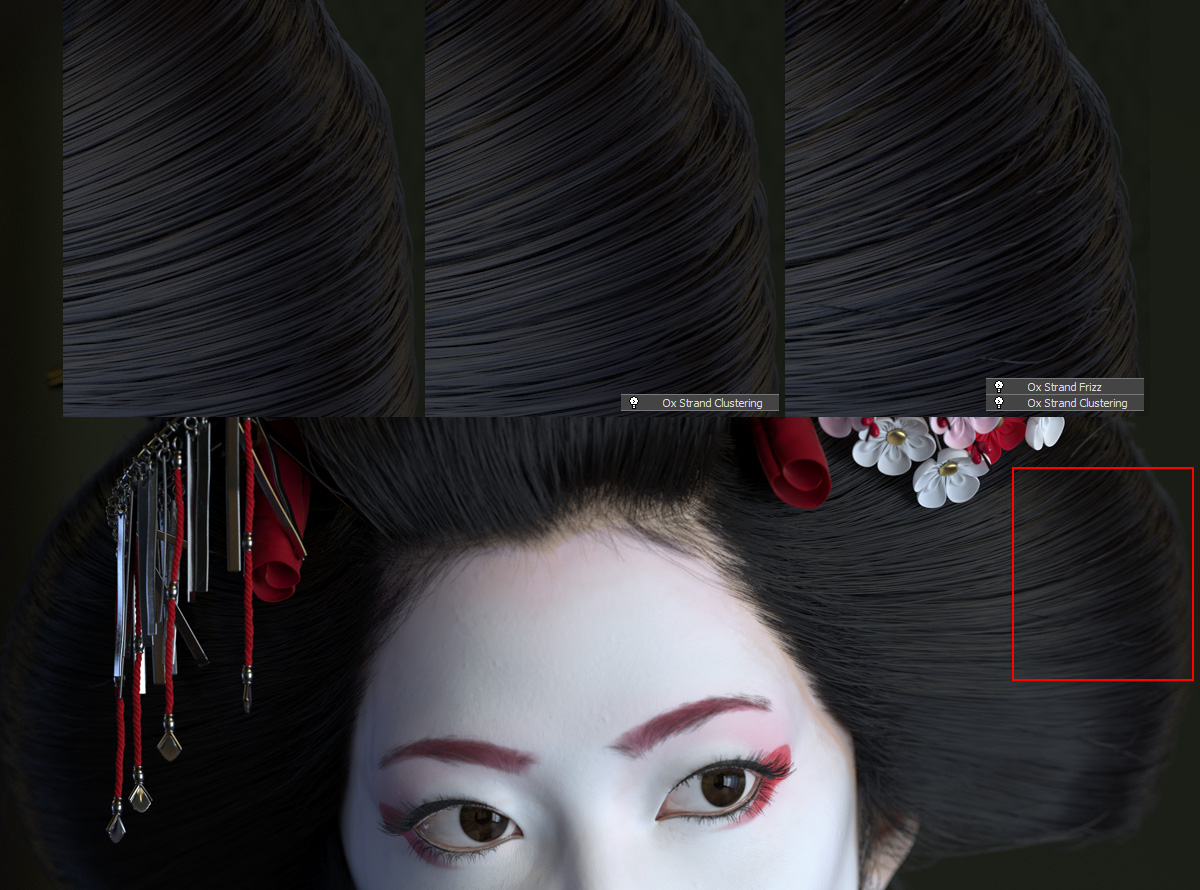
Besides from "Ox Strand Frizz" and "Ox Strand Length" I often use "Ox Strand Clustering". On the side piece it was used to add a bit of layering and strands clumping together.
As seen on the base mesh the sides consist of two different hair systems to help with the layering. For the sides I used the "Ox Strand Symmetry" to save time, always make sure to have
"Ox Strand Frizz" above in the modifier stack, that way the two sides wont be exact copies of each other.
Using this technique I could iterate the look and proportions of her hair style in a quick and non-destructive way, I like having the door open for big changes without losing much of the work already done.
Now with the bulk of the hair done and its look locked down I moved on to the polishing phase.
Transition and roughness pass

The polishing phase consisted of making the transition of the bigger hair pieces and her head feel more natural and believable. In addition to this I also did an "imperfection" pass, I added hair that
had "slipped" away to avoid a 100% perfect hair style, kind of like a dirt pass when texturing.
When working on the transition areas (forehead and neck) I used the more traditional approach of generating Guides from a polygon mesh. The Freeform Polydraw tools are great when it comes to placing these patches and sliding them on top of the scalp.
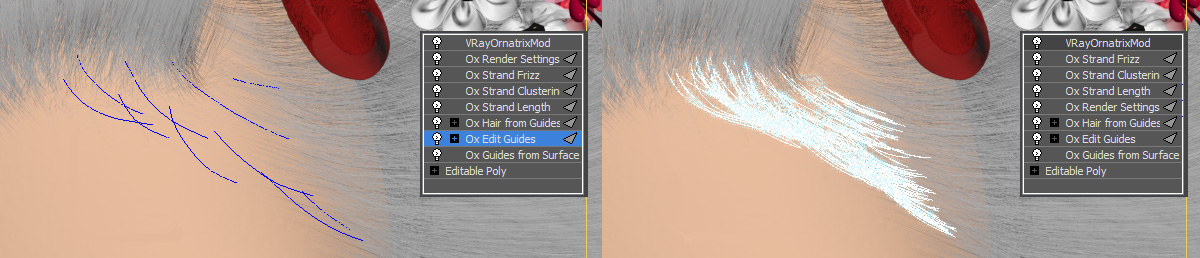
Then in "Ox Edit Guides" I would groom it using the brush tool and add the usual modifiers, Frizz, Clustering and Length on top to get the desired look.
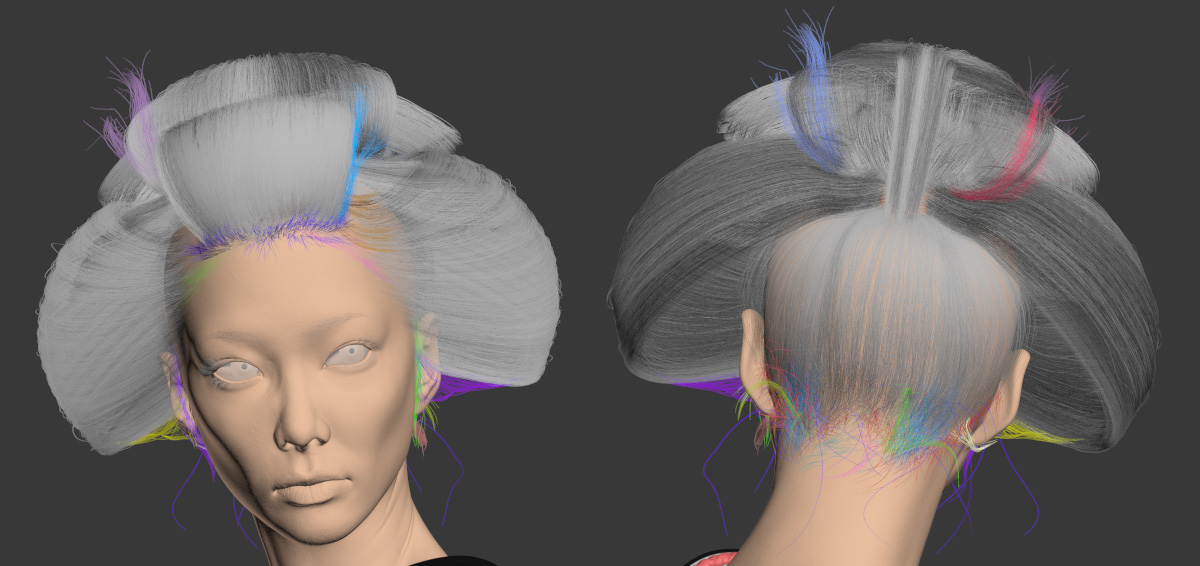
Here the different colored hair represent individual hair patches, created in a similar manor. It might look like a lot but most are copies of each other, then either altered with "Ox Edit Guides" or changed in a more procedural way using Frizz, Clustering or Curl.
Eyelids and eyebrows

The eye brows where created very much in the same fashion as the previous custom hair patches. I used two "Ox Strand Frizz" modifiers to gain that extra bit of control, one with a smaller scale setting
mostly affecting the tips of the strands, the other frizz has a bigger scale and randomizes the orientation a bit.
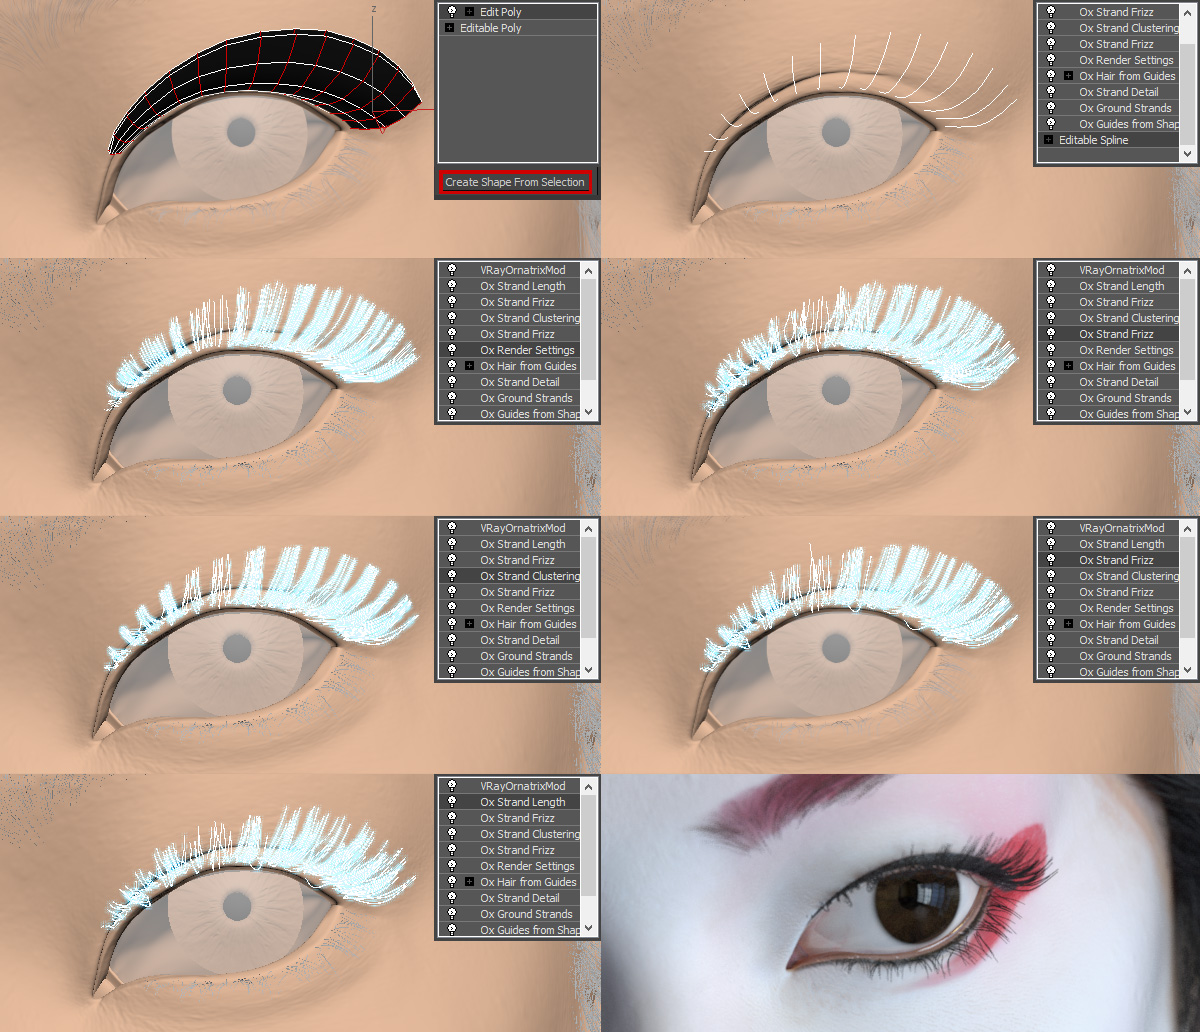
For the eyelids I once again wanted that extra control I get when modeling, so I started out with creating a basemesh and converting the splines. I had to experiment a bit with the amount of splines I was going
for, because that will affect how the Clustering will behave in the end. To get the right mascara feel I did a frizz cluster frizz solution, keeping most of the frizzyness to the bases of the strands.
This is a good example where the uneven length the"Ox Strand Length" can provide makes a huge difference.
Rendering and light setup
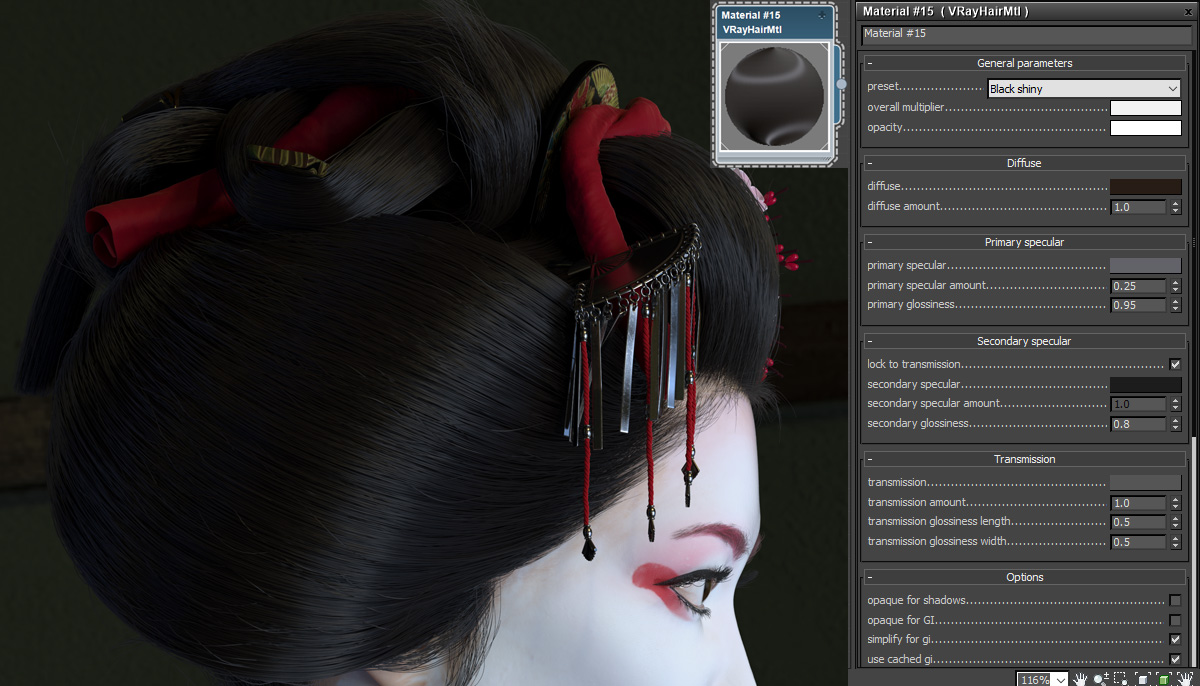
I used V-Ray for rendering and as a result the VRayHairMtl shader for the hair. This shader is fairly straight forward with a diffuse and two separate specular controls. I always avoid using 100% black,
first off it might result in artifacts, so at least use a very dark gray, but also it might help to sneak in a little bit of color, in this case dark brown. The primary spec I gave a tint of blue and brightened a bit,
compared to default settings.
There was a fair amount of trial and error when it came to the light setup, and the light setup will effect the outcome how the hair and its shader comes across a lot. Ambient light (a day of overcast, or using big soft box lights)
will give you broader highlights, and make the hair feel less glossy, and I wanted something sharper. In the end I went with a HDRI driven light setup, since that gave me the best results with my limited lighting experience.
There’s is plenty of HDRI images out there, and I ended up using an indoor one with two windows being the primary light sources, after trying out a few others.
ZBrush tip

I’ve mainly focused on the approaches I used for the creation of the hair in this "making of" but will quickly mention the use of hair in Zbrush. Quite quickly in projects I will add eyebrows,
and if its a female eyelashes as well, these can come from the previous character I made and quickly refitted. I find it helps a lot when sculpting and trying to find the personality of your subject if
he/she has these attributes. With the geisha I also added the early iterations of the hairs basemesh to see if the overall picture was heading in the right direction. Later I used the "Ox Mesh From Strands"
to convert the hair in 3Ds Max to geometry that could be exported and used in ZBrush as reference. I often work on things in parallel since one will effect the other.


Art and tutorial by 3D modelar Lars Martinsson.
Portfolio: https://www.artstation.com/lars_martinsson