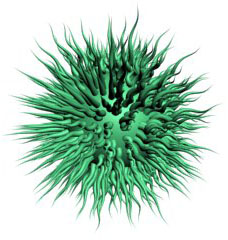
 Mesh from Strands Modifier
This modifier converts strands from hair state into mesh state. It is to be used in conjunction with (above in the stack) the render settings modifier, which can specify hair radius. There are a number of parameters that control mesh creation. There are three main types of meshes that can be generated from hair:
- Cylindrical hair (can be rendered from all angles, great for high quality hair)

Prismatic meshes are cylindrical N-sided structures that encapsulate each strand. Because they can be viewed from all directions, they can be rendered as they are or collapsed into baked meshes. This is often the best choice for strands that demand quality over quantity. Some examples include cat whiskars and lizard tails. Rendering very thin cylindrical hair usually causes artifacts, but these can be fixed with increasing sampling per pixel in your renderer.
Cylindrical hair has to be rendered with one of Max's shaders (such as standard) because the normals are generated away from the surface. - Billboarded hair (fast and cheap to render, great for dense thin hair, can be used with Ornatrix shaders)

Billboarded hair primitives are faces, one per segment, that form sprites which always face the camera. Since hair in nature is cylindrical, camera-facing billboards fill the task of rendering hair very well. They are cheap to generate and render, however one downside is the fact that they're not cylindrical and sometimes can't be used for things like whiskars, like prismatic mesh primitive. Billboarded hair can be oriented in any direction as well as controlled by a map to produce things like grass and tree leafs.
When using 'Tangents as normal' option, Ornatrix shaders (cheap, expensive, translucent) can be used to render the hair. - Proxy hair (use any arbitrary set of objects as hair. Great for managing large leafy scenes such as forests or bird feathers)

Proxy mesh-based hair allows you to take any mesh object (or a set of objects) in the scene and use it as a strand. Ornatrix will literally stretch the object along the strand and deform it using strand transforms. There are options to inherit hair's shape, thickness, orientation, and UVs for any number of arbitrary mesh objects. If multiple objects are added to the list, they will be randomly assigned to each strand. Randomness can be controlled through a seed parameter.
Orientation can be easily controlled with same parameters as used for billboarded hair. Proxy hair is great for things like bird feathers, tree leafs, and forests.- Texture Coordinates and Mapping Channels
If "Per Strand UV Coords." option is checked then proxy mesh generated for each strand will reuse the same texture coordinates as the incoming proxy mesh. If that option is off, then each mesh will have the texture coordinate of the underlying distribution mesh at each strand's position. This, in addition to adding multiple mapping channels with their own settings, allows using textures which vary with the surface of the distribution mesh and also with the strand geometry. - Material ID Assignment
- If "Scatter Randomly" option is off, a material ID will be assigned to each generated strand mesh according to the incoming proxy mesh which was used. For example, if a strand uses a mesh which is the 2'nd on the list, it will have material ID 2 in the resulting mesh. This allows using a sub-object material to assign different materials to different generated strands.
- If "Scatter Randomly" option is on, a material ID will be generated randomly for each mesh, or derived from the provided scatter map and/or strand group, similar to billboard hair.
- Mesh Twisting
The proxy mesh is stretched along the source strand, however, determining its twist can sometimes produce unwanted results. Use the <a href="orientBasedOnStrand.html">orient based on strand</a> option to fix this problem. When this option is on the proxy mesh will always be oriented based on the strand's current shape instead of a global twist angle.
- Texture Coordinates and Mapping Channels
Parameters

- Strand Group
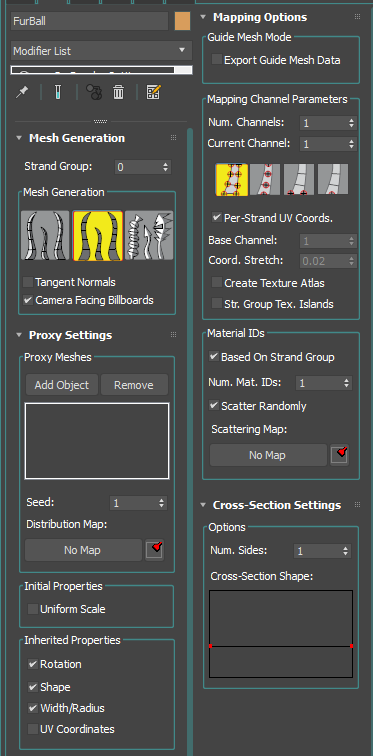
Allows you to isolate the effect of this modifier by selecting a Strand Group created in the Edit Guides modifier. - Tangent normals
When on, render normals generated on the mesh are actually hair tangents (perpendicular to normals). This option should be used when using Ornatrix shaders to render the hair. - Face camera
When using billboarded hair, during a render this option will orient all billboards to face the camera. - Number of sides
When using cylindrical hair this option sets number of sides of each hair cylinder. Total number of triangles (faces) in the mesh then becomes NumStrands * ( PointsPerStrand - 1 ) * NumSides * 2 - Uniform scale
If this option is on, generated proxy meshes will be scaled down uniformly (along all -X, Y, and Z axes) based on strand length. - Inherited properties
Determine which hair properties are inherited from underlying hair, and which properties are ignored. For example, if you wish for your objects not to deform with the strand length-wise, turn off the shape inheritance. - Conform To Surface
When on, the roots of the hair meshes will be aligned with the distribution mesh surface. This causes the hairs to appear to be glued to the surface.- Ignore Surface (Default)
Base of hair meshes will be aligned with the hair's tangent - Surface Normal
Base of hair meshes with be aligned with the base surface
- Ignore Surface (Default)
Mapping Parameters
- Per-strand UV coords.
If on, every strand will use its own UV coordinates spanning from 0 to 1. When off, these coordinates are inherited from hair. For example, when creating leafs you would usually use one texture for all leafs thus requiring every leaf to have its own set of UV's. - Create Atlas option gives you the ability to create texture island in combination with the previous settings.
- Strand Group Islands will create UV islands based on strand groups created in Edit Guides.
- "Material IDs" Rollout
By default all generated faces within the mesh will have the same material ID value of 1. However, with options in the Material ID group of this rollout you can parametrically specify how you want material IDs to be distributed in the resulting mesh. Material IDs can be used to apply multiple materials to the resulting hair mesh. To do this you can use the Multi Sub-Object material in 3ds Max.- Based On Strand Group
If this option is checked the material ID value will be the same as the strand group of each strand from which the mesh is generated. For example, if one strand has a group 1 and another group 2 then material IDs for all faces of meshes generated for these strands will also get these respective material ID values. - Num. Mat. IDs
Specifies how many material IDs to scatter in the resulting mesh if the "Scatter Randomly" option is used. - Scatter Randomly
When checked, material IDs from 1 through number specified in "Num. Mat. IDs" option will be randomly placed for each generated strand mesh. - Scattering Map (and Channel)
A grayscale map can be specified to specify which material ID will be used for each strand. Material IDs will be assigned depending on the "Num. Mat. IDs" parameter and the current grayscale value in this map for each strand.
- Based On Strand Group
Proxy Parameters
- Distribution Map
When specified, the grayscale values from this map will determine the index of the proxy mesh which will be used for each strand. If this map (or distribution channel) is not specified then a random proxy mesh will be used for each strand. - Distribution Channel
When specified, this channel's value will determine the index of the proxy mesh to be used for each strand.
C++ SDK Access
This object is accessible via Ornatrix C++ SDK. You need to get an instance of MeshFromStrandsModifierFPInterface which exposes numerous methods:
#include "MeshFromStrandsModifierFPInterface.h"

// Get modifier interface
auto meshFromStrandsInstance = MeshFromStrandsModifierFPInterface::GetInterface( myObject );
MaxScript Access
Besides the ability to get and set values for each individual value, Ox Mesh From Strands modifier also adds a few MaxScript methods:
-- Allows adding a proxy object from the scene into the collection of proxy objects used by the modifier
modifierInstance.AddProxyObject proxyObject

-- Allows removing a proxy object from the list. Returns true when the object was removed, or false if it was not in the list.
wasRemoved = modifierInstance.RemoveProxyObject proxyObject
Examples
You can find examples on usage of this modifier by examining the unit tests in Test_MeshFromStrandsModifier.ms.
Missing Something? Let us know if this page needs more information about the topic.


