Surface Comb Operator
Overview

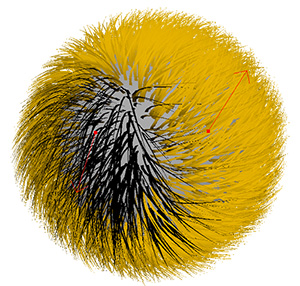
Surface Comb operator is designed to procedurally define the shape and orientation of character fur along a surface. It can be used to style large number of hairs at a macro level by using directional vectors to specify their flow and a curve to define their shape relative to the distribution surface.
Workflow
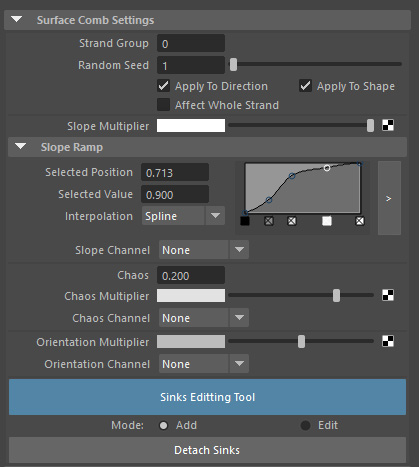
When Surface Comb operator is added you will see your hair change shape right away. It will be bending towards the surface and oriented in one direction. There are two controls to adjust right away: the slope graph which changes the shape of the hairs, and the sinks which direct the hairs along the surface.
Creating sinks
Start by pressing the Sinks Editing Tool button, then clicking and dragging on the character's surface mesh. This will create an arrow inside the viewport which will direct the hair. You can see the changes in real-time as you drag this arrow. You can add as many sinks as needed.
Editing sinks
If you want to modify a sink after creation change the Mode parameter from Add to Edit and then press the Sinks Editing Tool button. You can now click to select existing sinks and use Maya's transform tools (e.g. via W shortcut) to move them along the mesh surface. You can either click at the sink root to modify the overall sink position, or the sink arrow tip to modify its direction.
Deleting sinks
To delete a sink switch Mode option to Edit and press Sinks Editing Tool button. Then select the sinks which you want to delete in viewport and press the Delete button on keyboard.
Parameters

Strand Group
Specifies to which hairs this operator will be applied. Hairs not belonging to specified strand group will be ignored.
Random Seed
A randomness value to apply to parameters such as Chaos.
Apply to Direction
When turned on, this operator will change the hair direction along the surface using specified sinks. When off, direction of incoming hair will not be changed.
Apply to Shape
When turned on, this operator will modify the shape of hairs using the Slope Ramp. When off, shape of incoming strands will be preserved.
Slope Ramp
Controls the bending of hair strands towards the distribution surface.
Slope Multiplier
Allows using a texture map to vary the amount of Slope (bending towards surface) of hairs along the surface.
Slope Channel
Allows using a guide channel to vary the amount of Slope (bending towards surface) of hairs along the surface.
Per-sink slope ramps
While the Slope Ramp parameter allows specifying the shape of the strands globally it is also possible to specify the shapes for individual sinks.

To specify the slope shape for a specific sink first select it and then press the Override button in the Slope Ramp Override group of the Attribute Editor. You can now expand and modify the ramp to affect the selected sinks.
Due to some limitations the ramp control might not refresh its visual appearance after sinks are selected. This is benign, however, and you can get visual feedback as soon as you start editing the ramp.
To revert selected sinks back to using the global slope ramp use the Reset button.


