Recording Simulation
Videos
|
Recording Particle Flow particles (@2:20) |
Caching to external .lrd and .prt files |
Overview
After you have fine-tuned the simulation parameters it is time to bake the simulation into data which can be played back any time and saved with the scene. Lucid provides an internal mechanism to do this through its set of recording features. When you record the simulation, each Lucid object will internally store its state data per-frame and use this data to re-create the changes made by the simulation at any given time in the future.
Simulation is recorded for the current scene animation range. To change the keyframes for which the simulation is baked simply adjust the animation range values.
How to record simulation
First, make sure that 3dsmax's current animation range is set to the frame which you want to record. Then use of these methods to record the simulation:
- In Lucid toolbar click the Record button to start recording. During the recording you can click this button again at any time to abort recording.
- In Lucid main menu click the Record Active Time Range option.
- Use the
LucidRecordActiveTimeRange()command in MaxScript listener.
Selecting which objects are recorded
Some objects in the scene, like collision, convex, and SDF objects, are never recorded. At times you might also need to disable recording of other specific objects in the scene. For example, you might only want to record a soft body object floating in fluid but not the fluid itself.
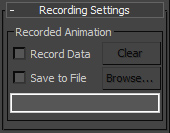
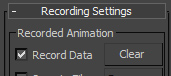
To turn off recording a specific object go to its options and find the Recording Settings rollout. Then uncheck the Record Data option.
Alternatively, you can select this object and use $.modifiers[#Lucid_Modifier].recordData = off MaxScript command in the listener.
How to clear recorded data
If you want to reset the recorded data in the scene or just make the scene file small again, you can clear the recorded data using these methods:- Simply begin simulating the scene again, it will clear the recorded data
- Start recording the scene again, which will clear previously recorded data
- Select your object and go to its settings, then find the Recording Settings rollout. Press the Clear button to remove recorded data only from this object. This button will only be enabled if there is recorded data present for the object.
Storing recorded data outside of the scene
You may choose to store the recorded simulation data outside of current .max file. This will keep the .max scene file small while also allowing you to play back the recorded simulation cache. This can allow you, for example, to send the small scene file to someone else to edit and then get it back while retaining the simulated data within it.
To save the scene externally:- Select the object and go to its options.
- Find the Recording Settings rollout
- Check the Save to File option.
- Click Browse button and select the destination file with extension .lrd (Lucid Recorded Data).

Exporting recorded data to Thinkbox PRT format
While you can use the method described above to store recorded data in .lrd format, you can also choose to export the data in .prt file format. This format can be used with Thinkbox products like Krakatoa to render and otherwise manipulate particles generated with Lucid.
Note that .prt file format can only be used to export and store particle simulation sequences and will not allow you to cache simulation of mesh changes. For that purpose you need to use the .lrd file format instead.
Preserving recorded data during subsequent simulations
After you have recorded your simulation Lucid will keep it in the scene until you re-simulate or re-record the scene, at which point the previously recorded data will be deleted. If you want the recorded data to survive subsequent simulations you need to de-activate the object by turning off the Active check box in the object's parameters. Inactive objects will not be added to simulations and will keep their recorded data until you manually clear it or re-add the object to simulation and re-simulate the scene.
|
Making recorded objects survive subsequent simulations |