Clumping
Clumping operator attracts groups of hairs together to produce distinct clumps. You can control how these clumps are generated, where they are placed, and how the hairs are attracted to them. Each clump is defined by it's center stem. When the clump node is first added a few random clumps are automatically generated on the hair.
The clumping is performed on currently visible hair inside the viewport. Any hair which is later added (for example, if you increase input hair count or during rendering) will use the hairs which were present during clump generation as guides. Closest guide clump hairs will be used to determine which clump the final hair belongs to.
Modifying the clumps after changing the viewport hair positions or count will not affect previous clumping, it will merely use the currently visible viewport hair to generate and update the internal clump guide hairs. This process is invisible to the user, however, it is important to understand this because having more hairs in viewport during clump generation and editing will produce more precise and detailed clump borders.
| Clumping tool |
Generating clumps
Clumps need to be generated manually by selecting a method for generation and clicking the Create Clumps button. Once they are generated they will remain until you either edit them or delete them. The generated clump data will remain stored with the operator.
- If you use the Create Clumps button without selecting clump hairs or clumps then all hair will be clumped using selected clumping method
- If you use the Edit Clump Hairs tool to select some hairs and then press the Create Clumps button then only the selected hairs will be clumped
Deleting clumps
You can delete a part of a clump or whole clumps at once using the Delete Clump(s) button:- If you use the Delete Clumps button without selecting clump hairs or clumps then all clumps on current hair object will be removed
- If you use the Edit Clump Hairs tool to select some hairs and then press the Delete Clumps button then the selected hairs will be de-clumped. This means that the current clump operator will have no effect on them until you clump them again.
- If you use the Edit Clumps tool to select some clumps and then press the Delete Clumps button then the hairs belonging to selected clumps will be de-clumped. This means that the current clump operator will have no effect on them until you clump them again.
Once a clump is deleted you can re-clump the de-clumped hairs at any time by selecting them and pressing the Create Clumps button again.
Clumping to guides
You can create clumps based on the guides which were used to generate the hair. For this you need to have a Hair from Guides operator below Clump operator in the hair stack. If the hair was not created from guides, for example if Hair From Mesh Strips or Baked Hair operators are used, then this method of clump generation will not work.
To clump hairs to guides:- In Attribute Editor set Clump Create Method parameter to Guides
- Click Create Clumps button
When the hair guides change shape (for example, when they are animated) the clumps will automatically follow their shape as long as the Clump Create Method is set to Guides.
If the hair guide count or positions change the clumps will not automatically update. You need to click Create Clump(s) again to manually update clumps when guide count changes.
Clumping to external strands
You can create clumps from another hair or guides shape in the scene. The clumps will be created to match the position and shape of the target "external" strands. This is useful when you want to create a separate set of guides, independent from current hair, to define clumps on your character. This also allows fine control over clump placement and density since you can control these parameters in a separate Guides from Mesh operator (located in a separate shape).
It is important that the "external" guides or hair shape is located under the same transform as the shape which has the Clump operator. In other words, the external strands are assumed to be in the same object space as the resulting clumps.
To clump hairs to external strands:- In Attribute Editor set Clump Create Method parameter to External Clump Strands
- Under External Clump Strands controls, click the Assign External Clump Strands button
- Click on the strands or hair shape which you want to use for clumps inside a viewport. If everything is correct you will see its name in the field above Assign External Clump Strands button
- Click Create Clump(s) button
When the external strands change shape (for example, when they are animated) the clumps will automatically follow their shape changes as long as the Clump Create Method is set to External Clump Strands.
If the strand count or root positions of external strands change the clumps will not automatically update. You need to click Create Clump(s) again to manually update clumps in that case.
Creating sub-clumps
Through a specially designed workflow Clump operator allows you to create smaller clumps within larger ones, to create an effect we call "sub-clumping". This may be useful to simulate fur where smaller bits of hair are stuck together inside larger clumps.
To achieve sub-clumping you need to stack two Clump operators on top of one another. The operator on the bottom is responsible for creating the larger clumps, and the one at the top generates smaller clumps within the already clumped hair. Thus the Clump operator on the bottom needs to generate a small amount of clumps and the one on the top needs to generate a much larger count. It is up to you how the clumps are generated, whether it be randomly, with groups, or through guides, this is not important for this process.
If you do this without any other steps you will notice that the top Clump operator will generate some clumps such that hairs in them jump between the larger existing clumps. This is not desired because it destroys the clumps formed by the Clump operator on the bottom.
To combat this a clump region strand channel needs to be generated by the operator on the bottom and used by the operator on the top. This will ensure that the hair jumping problem described above will not happen.
To create sub-clumps:- Add a Clump operator and generate a set of clumps, for example using Random clumping method
- In Attribute Editor enable the Add Clump Index Channel option. This will generate a new per-strand channel where each strand is assigned an integer value depending on which clump it belongs to.
- Add another Clump operator on top of the current one and generate another larger set of clumps. These will be the sub-clumps within the main ones.
- In Attribute Editor select the "ClumpIds" channel in Region Channel drop down
The resulting smaller clumps will now be contained within the larger clumps defined by the operator on the bottom.
A Sub-Clumping sample scene can be downloaded from here.
"Could not find a matching sub-clump" warning
When generating-sub clumps you may be presented with a warning: // Warning: Ornatrix: Could not find a matching sub-clump for N clumps
This is normal and is merely an indication that according to the way that clump regions were specified (with a map or a strand channel) did not allow for some of the newly generated clumps to belong to the same master clumps. When computing which master clump a sub-clump belongs to a matching process is used to ensure that both the sub-clump and master clump are located within the same region. However, it may be possible that some of the sub-clumps cannot be matched to the same region as their master clump.
This warning can be reduced or avoided by increasing the Region Clump Candidates parameter. The higher the value the more master clumps will be considered for each sub-clump until eventually a match is detected.
Parameters
Clumping Settings
These parameters control clumping globally. There is also a Selected Clump Settings category (see below) with a sub-set of these parameters which allows customizing individual clumps.
- Strand Group
Strand group pattern to which this operator will be applied. If empty all strands will be affected. - Random Seed
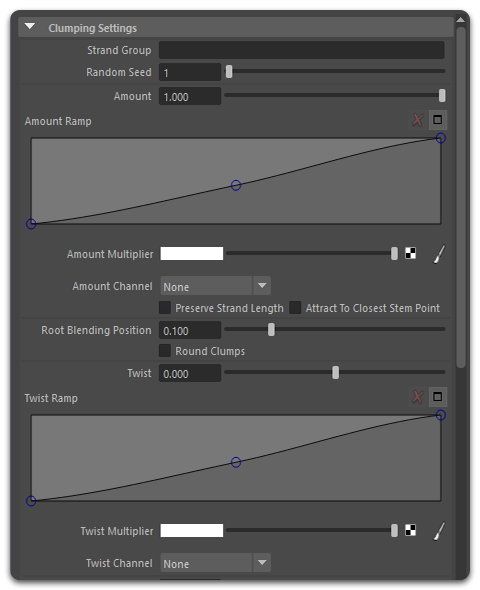
Controls the randomness of this operator's results. Change this value to modify the output. - Amount
Specifies the strength of clumping. Hairs will be attracted to the center of their clump more or less based on this value.- Amount Ramp, Multiplier, and Channel
Provides clumping amount control along strand length and distribution surface based on a curve, map, or a guide channel.
- Amount Ramp, Multiplier, and Channel
- Preserve Strand Length
When true the input hair strand lengths will not be modified during clumping. - Attract to Closest Stem Point
When true the closest point on clump stem for each hair point will be used to calculate the clumping amount and other length-varying parameters. Use this option when "Preserve Strand Length" in on for better results. - Root Blending Position
When this value is non-zero the strand shapes will be linearly blended from root to this position, between their original and clumped shapes. This is done to avoid roots becoming unglued from the distribution mesh when using an option like Round Clumps. - Round Clumps
When on, the clump profiles will be forced to be circular. This is useful when doing braiding to avoid intersections of individual clump stems. - Twist
Controls how much strands are twisted around the clump center. Negative values will twist counter-clockwise, otherwise twisting will be clockwise.- Twist Ramp, Multiplier, and Channel
Provides twisting control along strand length and distribution surface based on a curve, map, or a guide channel.
- Twist Ramp, Multiplier, and Channel
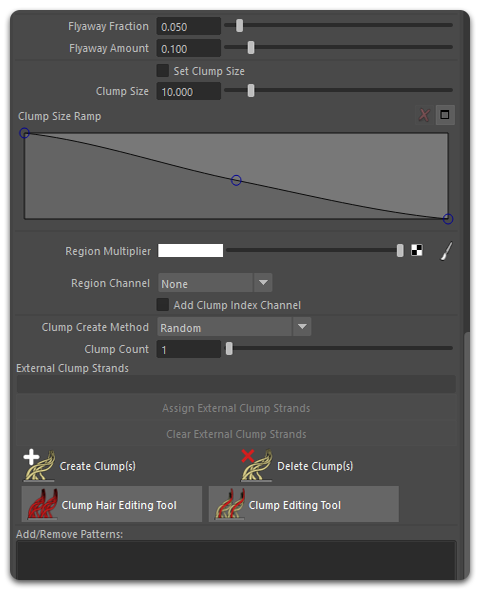
- Flyaway Fraction
Controls the fraction of hairs which will randomly not be clumped - Flyaway Amount
Controls the amount of clumping for flyaway hairs - Set Clump Size
When on, the profile of clumps will be forced to be this size (at places where Amount value is 1). This allows you to precisely control how big clumps are in absolute values to each other and is useful for braid stems. - Clump Size
When Set Clump Size is on, this sets the absolute clump profile diameter.- Clump Size Ramp
Controls the clump size along clump's length - Set Guide Clump Shapes
When on, the guides shapes will be used to define the clump stems. Otherwise, guides will only be used to define clump roots. This option is only applicable if clump creation mode is set to Guides or External Guides.
- Clump Size Ramp
- Region Multiplier and Channel
Clump region map or channel provide an explicit way of specifying which hairs should be clumped together. When generating clumps, new clumps will only be formed within the regions of the map or channel having the same values. Map can be color.
This parameter can be used in conjunction with another Clump operator's Add Clump Index Channel parameter (which generates the region map) to create sub-clumps which are clumps existing entirely within other bigger clumps. - Add Clump Index Channel
When on, a new per-strand channel containing hair clump indices will be added. Useful for sub-clumping. - Respect Hair Parts
When on, the clumping will be avoided between hairs and clump centers which belong to different hair parts
Clumping Space
These parameters determine in which space the clumps will be calculated. The chosen space matters because it will affect the assignment of hairs to their respective clumps. For example, in world space hairs will be assigned to clumps based on physical distance while in UV/surface space they will be assigned based on distance along a character's surface. However, UV space requires your base surface to have well defined texture coordinates.
- Use UV Space
Off by default. When on, UVs will be used to determine clump assignments. This will make clump calculation independent of a character's pose, but it also requires your character to have well defined UVs. - UV Channel
0 by default. Specifies the texture of the UV channel to use when Use UV Space option is on.
Clump Creation
- Clump Create Method
Specifies how clumps will be created when pressing the Create Clump(s) button. - Clump Count
Specifies number of clumps to be created when pressing the Create Clump(s) button. - Create Clumps
Use this button to create or update clumps manually
Clump Patterns
This feature allows you to manually or procedurally design the shape of the clumps. A list of patterns created using Braid Patterns or any guide object can be used for clumping. In the following image a Braid Pattern object was used to create a pigtail and assigned to the Clump operator to create some braiding.


- Global Clump Patterns
A list of currently used clump patterns. The order of patterns in this list matters because any per-clump pattern selections will reference it. - Pattern List
These are the patterns, selected from the global Patterns list, which will actually be used globally on clumps which don't have a per-clump pattern specification (see below). - Clump Pattern Rotation
Specifies the rotation value around a clump's stem for clump patterns
Selected Clump Settings
These parameters allow specifying parameters which will only apply to currently selected clumps. Use these values to customize individual clumps.
- Reset Clumps
If you press this button the settings for currently selected clumps will be reverted back to global values. - Amount Override and Ramp
Specifies per-clump Amount values. - Twist Override and Ramp
Specifies per-clump Twist values. - Pattern Indices Override
Specifies per-clump Patterns. These are selected from the global Patterns list (see above).
MEL Scripting
All of operations relating to clump management can be performed through scripting.
OxEditClumps Command
OxEditClumps command can create, delete, and reset clumps. Usage:
OxEditClumps "ClumpNode" [flag1] [flag2] ...
Flags
- -c [-create] method, count, randomSeed
Creates new count clumps using specified method and randomSeed. method can be one of the following:- 0 - Random (Clumps are generated randomly)
- 1 - StrandGroups (Clumps are generated from input hair strand groups)
- 2 - Guides (Clumps are generated from hair guides)
- 3 - ExternalClumpStrands (Clumps are generated from externally specified hair guides)
- -d [-delete]
Deletes currently selected clumps. Use -sl flag (see below) to specify the selection level to use for deletion. To delete individual clumps or clump hairs use clumpSelection and clumpHairSelection attributes to set the selection. If nothing is selected all clumps will be deleted. - -r [-reset]
Resets the properties of specified clumps. Use clumpSelection to select clumps prior to this command. If nothing is selected all clumps will be reset. - *-sl [-selectionLevel] level
Specifies the clump selection level to use. Use this flag either on its own (to set current selection level prior to executing another command) or together with another command. It is only useful with the delete command at the moment. level can be one of the following:- 0 - None
- 1 - Clump Hairs
- 2 - Clumps
Example: Create new clumps
PyMel: pm.mel.OxEditClumps( clumpNode, c = ( 0, 2, 1 ) )
Example: Select and delete clumps
PyMel:
clumpNode.clumpSelection.set( [0], type = "Int32Array" )
pm.mel.OxEditClumps( clumpNode, d = True, sl = 2 )
Related Topics
Missing Something? Let us know if this page needs more information about the topic.