 Weaver Pattern
Overview
Weaver pattern shape allows you to generate tileable sets of curves to be used inside the Weaver operator. The patterns are composed of a set of Maya NURBS curves which overlay a predefined square pattern shape. The edges of the curves, when aligned properly with the edges of reference shape, will connect together to form a more detailed weave when used with Weaver.
The output of the pattern shape is standard Ornatrix guides. As such you can apply additional operators to this shape, such as Frizz.
Reference Shape
A pattern needs to be made in such a way that Weaver can duplicate, tile it (if desired), and place it with other patterns. For example, in a quad polygon Weaver can place 4 patterns, 2 along each edge. It does this by taking the pattern's reference square and tiling it vertically and horizontally. Any curve endings along the edges which match on each side of the pattern will be automatically connected to form a longer curve. This way you can create simple or complex tiles of curves which will then be connected to form complicated weaves.
The pattern square is visualized inside the viewport to give you a sense of where to place them curves. They must overlay the reference shape. You can control the reference shape dimensions using provided parameters.
Parameters
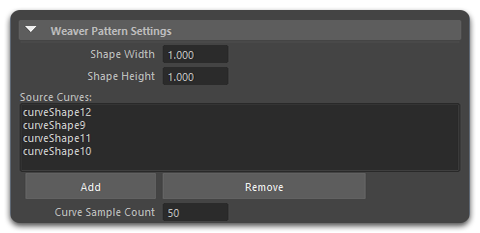
Weaver Pattern Settings
These parameters are used to control the shape of the reference square and the detail of the resulting pattern.
Shape Width
The width of the reference shape.
Shape Height
The height of the reference shape.
Source Curves
A list where you can add external Maya NURBS curves to be present in this pattern shape.
Curve Sample Count
Specifies how many points to sample from each provided NURBS curves to generate the resulting weave pattern guides.
Creating basic pattern
- Add a Weaver Pattern object to the scene. You can find it in the Ornatrix shelf. This will add an square shape to the center of the scene.

- In the Create Maya menu select a curve tool from the Curve Tools menu and draw some curves to define your pattern. Make sure the ends of the curves are as close as possible to the borders of the pattern shape.
- Select the Weaver Pattern object and add the curves to the pattern using the Add Multiple button found in the Attribute Editor and clicking the curves in the viewport. You should end up with something like the following image:
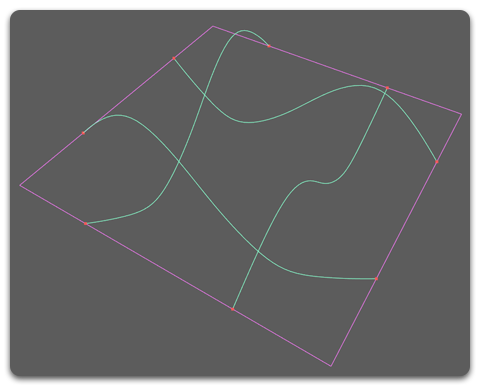
Weaver will convert those curves into Ornatrix guides that can be affected by any Ornatrix operator like Frizz or Curl operator. The curves will remain connected to the guides. This means that modifying the curves will also affect the guides.
Now you can scatter this pattern across a surface using the Weaver tool.
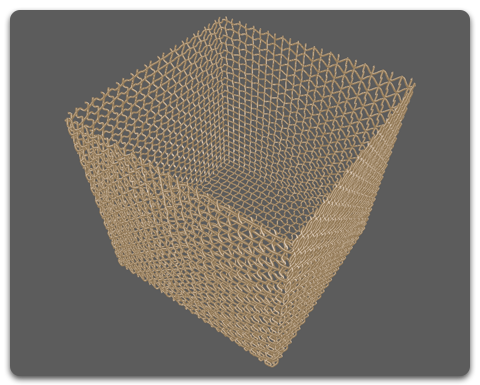
Sample scene
A sample scene with a Weaver object and a Weaver pattern used to create a basket can be downloaded from HERE.
Related Topics
Missing Something? Let us know if this page needs more information about the topic.