 Hair from Guides
Hair from Guides operator generates dense hair. This operator's primary task is to take in a set of guides and based on the provided info create a dense hair volume based on those guides. Hair from Guides is responsible to produce arbitrarily dense hair strands that best describe the volume specified by provided guides. Just like the Guides from Mesh operator, you get the distribution options to control the way dense roots are distributed over the mesh.
Parameters
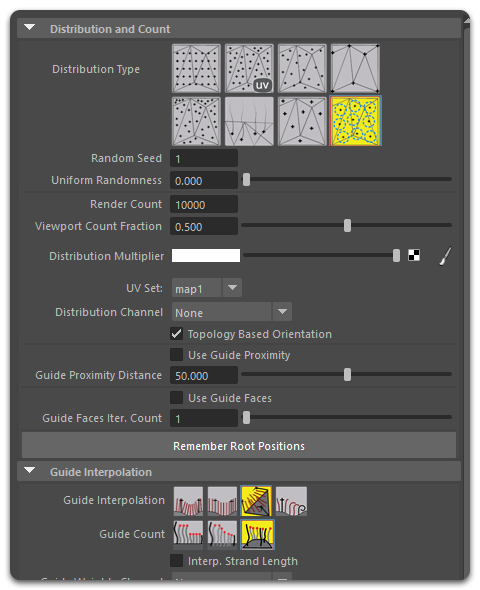
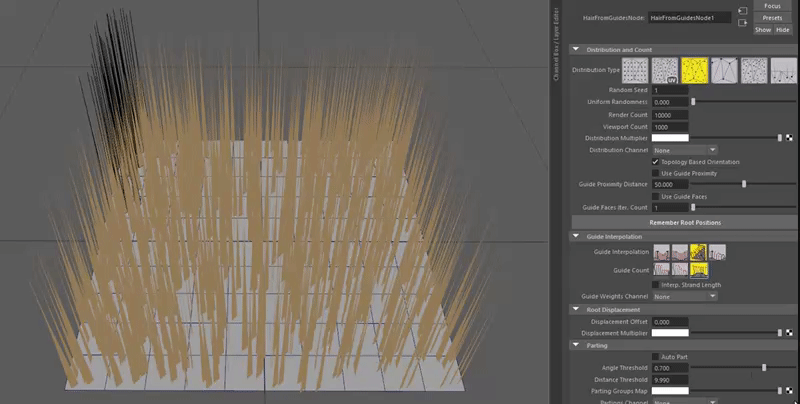
Distribution and Count
This group of parameters controls how and where the hair roots are placed onto the distribution surface.
Distribution Type
There are several distribution methods for spreading hair roots along the surface:
- Uniform
Roots are placed in a linear manner forming a 'grid' around the mesh. This can be useful while creating brush patterns where hair has been planted artificially. - Random (area-based)
Roots are created randomly, and the amount of roots per face is calculated based on the total area of all faces on the mesh. Therefore all roots will be distributed evenly and randomly throughout the mesh. You can control the random factor through the seed value. Same seed values will produce similar results. - Random (face-based)
Same as above, except the amount of roots per face is the same for every face on the mesh. Therefore larger faces will tend to have sparser root placement, while smaller ones will have roots more clustered in one spot. - Vertex
One root is generated at each vertex of the surface mesh. - Random (UV-based)
Same as area-based approach, except this time instead of calculating area for every face, UV area of faces is calculated. This allows user to control the distribution by maintaining UVW coordinates on the mesh. It is possible to unwrap a character, for example, and have dense placement of hair in some spots than the others by stretching out those areas in the UV editor. - Guides has hair
Simply converts incoming guides into resulting hair without generating any new strands. - Face Center
Roots are placed at the center of each polygon face or triangle. - Even
Roots are placed on the surface randomly but at the same distance from one another. This method provides the most realistic root placement result for natural hair phenomena.
Uniform Randomness
A parameter called Uniform Randomness is available to offset hairs in random directions after they've been created with Uniform distribution. This can be used to fix the exact even positions of uniformly placed roots and give them a little variation. Use this parameters for creating feathers, for example, where hair roots need to be placed evenly yet have some variation on the surface.
Uniform Randomness only works when Uniform distribution method is used.
Random Seed
Change this value to shuffle the positions and random lengths of the resulting guides.
Render Count
Specifies the total number of roots to generate during rendering.
Viewport Count Fraction
Specifies the percentage of roots to generate inside viewports.
Distribution Map
An optional multiplier map for hair density on the surface.
Distribution Channel
Allows you to specify a vertex color set or a guide channel to control the hair density over the mesh.
Topology Based Orientation
When on the rotation of hairs will be "glued" to the distribution mesh. Rotations will be computed relative to the orientations of mesh edges and thus properly react to deforming geometry. When off, the rotations will be calculated in global scene coordinates.
Use Face Include
When on guides will only be generated on selected faces. This option will only have an effect if some face components were selected when current Guides from Mesh operator was added.
Use Guide Proximity
When on, only hairs that are within a certain distance of a guide will be generated. Hairs far from guides will be culled.
Guide Proximity Distance
When Use Guide Proximity is on, this specifies the maximum distance a hair must be away from a guide for it to be generated. This will make hair only be generated around guides.
Note that if you use Barycentric interpolation guides will be chosen based on the distribution mesh vertices and thus you might not get the exact results. To avoid this use Affine interpolation.
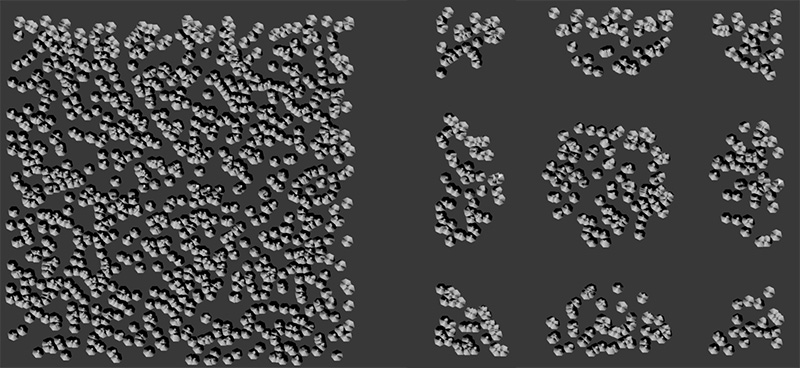 On the left all hair is generated. On the right guide proximity is turned on, causing hairs to be generated only around their closest guides. |
Use Guide Faces
When used, this option will plant new roots only on faces that are close to guides. Using the iterations parameter you can control how close a face has to be to a guide for roots to be planted on it. 1 means roots have to be on same face as one of the guides. 2 means roots have to be on a face that touches a face that has a guide on it. This usually works well with meshes that have many faces.
Root Caching
Ornatrix can store the positions of generated roots in memory instead of having to re-generate them from scratch when scene opens or if distribution parameters change. This allows you to have predictable unchanging hair roots which are guaranteed not to change in the future. The following options control this process:
- Remember Root Positions
When this option is used the root positions generated by this operator will be cached and saved with the scene. This can ensure that you can send the same scene to other computers and render it without the risk of roots being generated in different places causing them to "jitter". Use this option after you have set up the hair to your liking. When this option is on changing other distribution parameters will not have any effect. When you turn this option off the guides will be regenerated using current distribution parameters. - Cache File Path
This holds an optional Alembic file path where the root information is stored when specified. If this parameter is empty roots will be stored along with the .ma/.mb scene, making it larger in size.
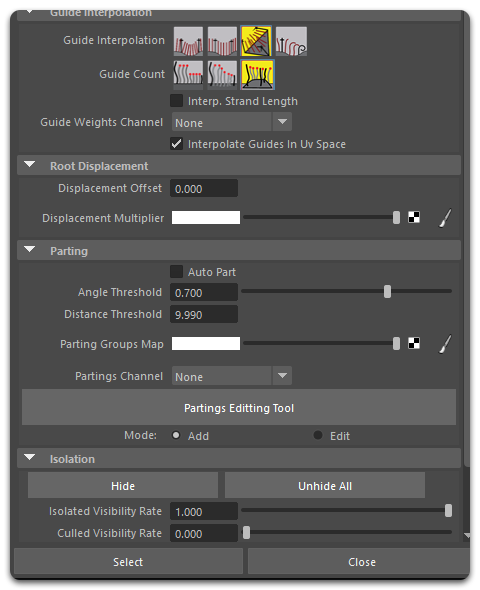
Guide interpolation
Parameters in this group change the way hair shape is constructed from input guides.
Guide interpolation
There are several parameters that can dramatically change the look and behavior of dense hair as a subset of guides. Whenever a hair strand is planted, it has to be interpolated in order to achieve smooth transition from guide to guide. There are a couple of interpolation types available:
- Polar interpolation
Use internal strand space, interpolate by rotating transforms.
This method will produce the smoothest results. For every created strand hair orientation is determined by the surface normal at that location. Therefore as the surface curves, hair will curve along with it. Strands are interpolated in their local space so you will see them rotating which might not always be ideal, especially for longer hair.
If used properly, only a few guides on the whole surface could be required to form a hair volume. Ð downside to this method is that polar interpolation will have two poles (or sinks), where hair will not be well defined and will tend flip. If you only need a part of your surface covered, or if the surface is not fully round, this method is the best to use.
This option is recommended when using the instanced strands option. - Affine interpolation
Uses closest guides, interpolate in object space.
Unlike the above method, this interpolation type does not take surface information into account. Instead it directly interpolates between strands. Lets say there are two guides - A and B - and we create a dense strand C and its right in the middle between these two guides. The tip of of strand C will lie in the middle of the line formed by tips of guides A and B. - Barycentric interpolation
Uses distribution mesh vertices.
This is the default, and most robust method. To interpolate hairs between guides this method utilizes surface dependence information and underlying mesh topology. This is only possible if you have both of these available. At first, for each vertex on the distribution mesh closest guide information is calculated. Then for each hair the closest vertices are looked up on the mesh and information from these vertices is used to determine which guides will be used for interpolation.
The downside of this approach is requirement for the distribution mesh to be relatively dense. If there are too few vertices then you might lose guide information. - Segment interpolation
Using this method can produce better results if you have guides which greatly change shape and want the resulting hair to blend between these guides smoothly. It blends guides using their individual segments and tries to smoothly blend the overall length of each strand. - Interpolate Strand Length
When ON, hair length will be interpolated between guides. - Interpolation Weight
Allows the use of a guide channel to control the interpolation weight or how much hair is attracted to specific guides.
Guide Area Barycentric Triangulation Type
When using Barycentric interpolation type there are different ways to calculate the interpolation:
- Distribution Mesh
The interpolation uses the mesh topology to determine how guides affect the generated hairs - Nearest Neighbour Triangulation
Guide roots are re-triangulated and the result is used to determine the interpolation. This method is slower but gives better results. - Manual Triangulation
Same approach as above but additional steps are undergone to remove some artifacts
Guide Count
For the first two interpolation types you can control the amount of guides that every dense strand is interpolated in between. Setting this value to 1 will result in no interpolation at all, and every dense strand will automatically copy the nearest guide. Setting this value to 3 will result in a triangular interpolation where every strand will be an average of 3 closest guides. Note though, that barycentric interpolation always uses three guides and setting a lower guide count will make hair length largely dependent on how far the two or one closest guides are to it.
Interpolate guides in UV space
When enabled, the interpolation of hairs from guides will be based on the texture space of distribution object. Otherwise object space coordinates will be used.
Root Displacement
Parameters in this group control if and how roots are moved from their generated position. Use these controls to add an additional offset to hairs along surface normals.
Displacement Offset
An optional offset along surface normals of generated guides. Allows you to push away guides from the surface if needed.
Displacement Map Minimum Value
Specifies the offset for black values of the displacement map. 0 by default, if this is -1 then displacement will be negative, if it is 0.5 then displacement will happen on both sides of the surface.
Displacement Multiplier
An optional surface map multiplier for the Displacement Offset parameter. Use to vary displacement along the surface with a texture map.
Parting
This group has parameters which separate hair into partings. Hairs in separate partings do not blend their shape in between themselves. Hair can be parted to create separate groups that are not interpolated in between. Partings can be auto-generated, specified with a map or a channel, or created manually in partings sub-object mode.
- Auto Part
If on, partings will be automatically deduced based on the relative angles of incoming guides. If two guides are facing away from each other the hairs between them will not interpolate between both guides, instead choosing the closest guide. - Angle Threshold
If Auto Part option is used, this parameter determines the angle threshold which is used to either part or not part the hair between guides. - Distance Threshold
If Auto Part option is used, this parameter determines the maximum distance between two guides which would be placed into the same parting. - Parting Groups Map
An optional texture map where black and white values can separate hair partings on the mesh surface. - Partings Channel
This parameter can be used to manually specify partings using a guide channel or a vertex color set. - Strand Groups
You can use strand groups to separate hairs into parts. Because a single strand can belong to multiple groups you can have regions of hairs which blend smoothly while still being parted between each other. For example, a strand in groups 1,2 will not be parted with a strand in group 1 or a strand in group 2, but strand in group 1 will be parted with a strand in group 2.
Isolation
When the number of hairs on a character becomes too great to preview or manage at the same time it may be needed to only display a selected region of hairs while hiding the rest. This will simplify hair editing by speeding up the display refresh rate and also visually focus editing to a small subset of hairs of the overall hair model.
Isolation section of Hair from Guides Attribute Editor parameters provides controls to do this.
- Use the Isolate button to select the isolation tool. This tool allows you to draw a region inside the viewport. All hairs within this region will be left, while all other hairs will be hidden.
- Use the Unhide All button to remove any isolation of hairs, returning them to normal display mode
- Selection Shape dropdown specifies how the region will be drawn with the Isolate tool inside the viewport:
- Lasso
Draw a selection lasso around the target hairs - Rectangle
Drag a rectangle to select the target hairs - Circle
Drag a circle from its center to select the target hairs
- Lasso
- Isolated Visibility Rate
The fraction of isolated/visible hairs which will be visible. This is a percentage of render hair count. By default this value is 1 so you will see all isolated hairs as they will appear inside the render. You can decrease this parameter to show fewer hairs if needed. - Culled Visibility Rate
Specifies the fraction of culled/hidden hairs which will remain visible. Default is 0 which means that all isolated hairs will be hidden. However, you can increase this parameter to show some of the isolated hairs.
Generated Data
Generate Per Strand Data
When on, any per-strand data present in guides will be interpolated into resulting hairs.
Generate Per Vertex Data
When on, any per-vertex data present in guides will be interpolated into resulting hairs.
Texture Coordinates
Specifies the method used for generating texture coordinates. The following options are available:
- None
Do not generate texture coordinates. - Inherit From Base
Use the texture coordinates of the base surface. - Flat Map
Generate unique texture coordinates for each strand. Strands are aligned on a rectangular grid in uv space, with each strand occupying a single cell with constant u and extending vertically along v.
Other parameters
Many of the options used by this component are similar to those used in Guides from Mesh. Please refer to that help for reference.
- Additional root data
These four options control which data gets exported with hair. Some data, such as per-root transform matrix takes up a lot of memory (in fact it takes same memory per-root as 4 vertices). Therefore if you are sure that some of this data isn't going to be used later on in the pipeline you can choose not to export it, thus saving memory. One useful example is removing root tm and guide dependence data when exporting very dense fur. - Export object type
This determines whether dense hair or guides are generated. Sometimes during modeling it is useful to interpolate between results to increase/decrease guide count. - Guide proximity
This option isn't implemented in V1 or V2 - Use guide faces
When used, this option will plant new roots only on faces that are close to guides. Using the iterations parameter you can control how close a face has to be to a guide for roots to be planted on it. 1 means roots have to be on same face as one of the guides. 2 means roots have to be on a face that touches a face that has a guide on it. This usually works well with meshes that have many faces. - Instanced strands
If on, all strands will be instanced by provided guides. This means that really only one hair is generated per a guide, and the rest are simply using same memory to display the guide offset at their root. Memory usage is greatly conserved, especially with very dense hair objects.
For best results it is advised that you use polar interpolation to generate the dense hair from guides using this option. - Use UV coords
Specifies whether mesh UVW coordinates or root world coordinates are to be used to determine relative guide/hair positions. - Auto-part hair
It is often necessary to have different groups of hairs on a mesh. By default this isn't possible since hairs all interpolated to form a continuous volume. Auto parting takes an angle or distance threshold and determines whether hair should be interpolated between specific guides or not. If two guides are oriented or located apart further than provided thresholds a parting will be generated between them. Note that you may also part hairs using a map or a guide channel. - View Count from Render
When enabled, the number of hairs displayed in the viewport will be determined by the percentage value of the render count parameter. - View Count Percentage
When View Count from Render parameter is on, this determines the percentage of dense count parameter which determines number of hairs displayed inside viewports. - Render Count
Determines the number of hairs generated by this modifier when rendering the scene.
Viewport and Render Count
To make it easier and quicker to edit hair Ornatrix provides an option to have fewer hairs displayed while working in the viewport than during rendering of the scene. Typically a fraction of hair displayed is good enough to accurately preview what will appear in the rendered result. However, these parameters can be adjusted by you at any time. Use the Viewport Count and Render Count parameters to set these values.
When Ornatrix detects that Maya is rendering the scene it will re-generate your grooms with the render hair count. Once the rendering is done it will switch back to using the viewport count.
Notice that the IPR (Interactive Photo-realistic Renderer) will not use the render count, as it runs in parallel with the scene editor and it doesn't notify the scene about its operation.
Switching between viewport and render count manually
If you want to always see the render count of the hair, or if Maya fails to set viewport count after rendering for some reason you can manually switch between the render and viewport mode using the following MEL command:
// Sets the Ornatrix render mode on
OxSetIsRendering( true );

// Sets the Ornatrix viewport mode on
OxSetIsRendering( false );
Freezing the generated hairs
Sometimes it is necessary to ensure that the results generated by Hair from Guides operator remain consistent even if you send the scene to a different computer and (accidentally) change some of the distribution parameters. For this reason we have the Remember Root Positions check box.
Enabling this option will make the operator generate and cache the root positions of rendered hairs. This ensures that the generated hair will remain consistent among shots rendered on different computers since random generation algorithms can vary across hardware. It is a good practice to enable this option when rendering hair on a render farm. Disabling this option will clear the cache.
The cache is stored with the scene and thus will increase your scene file size. The check box must be unchecked and then checked again if you modify any of the distribution parameters to reflect the changes. The caching process might take a few seconds depending on your render hair count.